Month: June 2025

MMS • RSS

Artificial intelligence is the greatest investment opportunity of our lifetime. The time to invest in groundbreaking AI is now, and this stock is a steal!
AI is eating the world—and the machines behind it are ravenous.
Each ChatGPT query, each model update, each robotic breakthrough consumes massive amounts of energy. In fact, AI is already pushing global power grids to the brink.
Wall Street is pouring hundreds of billions into artificial intelligence—training smarter chatbots, automating industries, and building the digital future. But there’s one urgent question few are asking:
Where will all of that energy come from?
AI is the most electricity-hungry technology ever invented. Each data center powering large language models like ChatGPT consumes as much energy as a small city. And it’s about to get worse.
Even Sam Altman, the founder of OpenAI, issued a stark warning:
“The future of AI depends on an energy breakthrough.”
Elon Musk was even more blunt:
“AI will run out of electricity by next year.”
As the world chases faster, smarter machines, a hidden crisis is emerging behind the scenes. Power grids are strained. Electricity prices are rising. Utilities are scrambling to expand capacity.
And that’s where the real opportunity lies…
One little-known company—almost entirely overlooked by most AI investors—could be the ultimate backdoor play. It’s not a chipmaker. It’s not a cloud platform. But it might be the most important AI stock in the US owns critical energy infrastructure assets positioned to feed the coming AI energy spike.
As demand from AI data centers explodes, this company is gearing up to profit from the most valuable commodity in the digital age: electricity.
The “Toll Booth” Operator of the AI Energy Boom
- It owns critical nuclear energy infrastructure assets, positioning it at the heart of America’s next-generation power strategy.
- It’s one of the only global companies capable of executing large-scale, complex EPC (engineering, procurement, and construction) projects across oil, gas, renewable fuels, and industrial infrastructure.
- It plays a pivotal role in U.S. LNG exportation—a sector about to explode under President Trump’s renewed “America First” energy doctrine.
Trump has made it clear: Europe and U.S. allies must buy American LNG.
And our company sits in the toll booth—collecting fees on every drop exported.
But that’s not all…
As Trump’s proposed tariffs push American manufacturers to bring their operations back home, this company will be first in line to rebuild, retrofit, and reengineer those facilities.
AI. Energy. Tariffs. Onshoring. This One Company Ties It All Together.
While the world is distracted by flashy AI tickers, a few smart investors are quietly scooping up shares of the one company powering it all from behind the scenes.
AI needs energy. Energy needs infrastructure.
And infrastructure needs a builder with experience, scale, and execution.
This company has its finger in every pie—and Wall Street is just starting to notice.
Wall Street is noticing this company also because it is quietly riding all of these tailwinds—without the sky-high valuation.
While most energy and utility firms are buried under mountains of debt and coughing up hefty interest payments just to appease bondholders…
This company is completely debt-free.
In fact, it’s sitting on a war chest of cash—equal to nearly one-third of its entire market cap.
It also owns a huge equity stake in another red-hot AI play, giving investors indirect exposure to multiple AI growth engines without paying a premium.
And here’s what the smart money has started whispering…
The Hedge Fund Secret That’s Starting to Leak Out
This stock is so off-the-radar, so absurdly undervalued, that some of the most secretive hedge fund managers in the world have begun pitching it at closed-door investment summits.
They’re sharing it quietly, away from the cameras, to rooms full of ultra-wealthy clients.
Why? Because excluding cash and investments, this company is trading at less than 7 times earnings.
And that’s for a business tied to:
- The AI infrastructure supercycle
- The onshoring boom driven by Trump-era tariffs
- A surge in U.S. LNG exports
- And a unique footprint in nuclear energy—the future of clean, reliable power
You simply won’t find another AI and energy stock this cheap… with this much upside.
This isn’t a hype stock. It’s not riding on hope.
It’s delivering real cash flows, owns critical infrastructure, and holds stakes in other major growth stories.
This is your chance to get in before the rockets take off!
Disruption is the New Name of the Game: Let’s face it, complacency breeds stagnation.
AI is the ultimate disruptor, and it’s shaking the foundations of traditional industries.
The companies that embrace AI will thrive, while the dinosaurs clinging to outdated methods will be left in the dust.
As an investor, you want to be on the side of the winners, and AI is the winning ticket.
The Talent Pool is Overflowing: The world’s brightest minds are flocking to AI.
From computer scientists to mathematicians, the next generation of innovators is pouring its energy into this field.
This influx of talent guarantees a constant stream of groundbreaking ideas and rapid advancements.
By investing in AI, you’re essentially backing the future.
The future is powered by artificial intelligence, and the time to invest is NOW.
Don’t be a spectator in this technological revolution.
Dive into the AI gold rush and watch your portfolio soar alongside the brightest minds of our generation.
This isn’t just about making money – it’s about being part of the future.
So, buckle up and get ready for the ride of your investment life!
Act Now and Unlock a Potential 100+% Return within 12 to 24 months.
We’re now offering month-to-month subscriptions with no commitments.
For a ridiculously low price of just $9.99 per month, you can unlock our in-depth investment research and exclusive insights – that’s less than a single fast food meal!
Here’s why this is a deal you can’t afford to pass up:
- Access to our Detailed Report on our AI, Tariffs, and Nuclear Energy Stock with 100+% potential upside within 12 to 24 months
- BONUS REPORT on our #1 AI-Robotics Stock with 10000% upside potential: Our in-depth report dives deep into our #1 AI/robotics stock’s groundbreaking technology and massive growth potential.
- One New Issue of Our Premium Readership Newsletter: You will also receive one new issue per month and at least one new stock pick per month from our monthly newsletter’s portfolio over the next 12 months. These stocks are handpicked by our research director, Dr. Inan Dogan.
- One free upcoming issue of our 70+ page Quarterly Newsletter: A value of $149
- Bonus Content: Premium access to members-only fund manager video interviews
- Ad-Free Browsing: Enjoy a month of investment research free from distracting banner and pop-up ads, allowing you to focus on uncovering the next big opportunity.
- Lifetime Price Guarantee: Your renewal rate will always remain the same as long as your subscription is active.
- 30-Day Money-Back Guarantee: If you’re not absolutely satisfied with our service, we’ll provide a full refund within 30 days, no questions asked.
Space is Limited! Only 1000 spots are available for this exclusive offer. Don’t let this chance slip away – subscribe to our Premium Readership Newsletter today and unlock the potential for a life-changing investment.
Here’s what to do next:
1. Head over to our website and subscribe to our Premium Readership Newsletter for just $9.99.
2. Enjoy a month of ad-free browsing, exclusive access to our in-depth report on the Trump tariff and nuclear energy company as well as the revolutionary AI-robotics company, and the upcoming issues of our Premium Readership Newsletter.
3. Sit back, relax, and know that you’re backed by our ironclad 30-day money-back guarantee.
Don’t miss out on this incredible opportunity! Subscribe now and take control of your AI investment future!
No worries about auto-renewals! Our 30-Day Money-Back Guarantee applies whether you’re joining us for the first time or renewing your subscription a month later!
MMS • RSS
The popularity of Laravel has improved recently as more developers have started to adopt the technology. Laravel has an easy-to-understand syntax that boosts productivity by letting the developer focus on the core features of their application and not bother with repetitive tasks like authentication and sending emails. It has a very vibrant community of users and great learning materials.
Freshly created Laravel applications are configured to use relational databases. The purpose of this tutorial is to show how to use MongoDB in a Laravel application. We will build a simple task reminder system to achieve this.
Prerequisites
The following tools and technologies are required to follow along effectively with this tutorial.
- A free MongoDB Atlas cluster
- PHP and Composer
- NPM
- Basic knowledge of the Laravel framework
- Familiarity with MongoDB and NoSQL databases
Environment setup
To work with MongoDB, we need to configure our development environment. We need to ensure that all the necessary development dependencies are installed and configured properly. Make sure you have the following installed.
- PHP and the MongoDB extension
- Composer
Project setup
To get started building our reminder system, the first thing to do is create a new Laravel project. We can do so using the composer with the command below:
composer create-project laravel/laravel LaravelMongodbProject
cd LaravelMongodbProject
Install MongoDB Laravel package
A freshly created Laravel project when installed comes with default configurations for relational databases like MySql and PostgreSQL. MongoDB does not work in Laravel by default. We need to install the Laravel MongoDB package and also do a little configuration in config/database.php. Proceed to install the package using the command below:
composer require mongodb/laravel-mongodb
Configure database
Once the installation of the Laravel MongoDB package is completed, the next step is to add our MongoDB database connection to our config/database.php file to complete the configuration. Copy the code below and paste it in the connections array that contains configurations for other database types.
return [
'connections' => [
'mongodb' => [
'driver' => 'mongodb',
'dsn' => env('MONGODB_URI'),
'database' => 'YOUR_DATABASE_NAME',
],
//You can keep other existing connections
],
Let’s take a moment to explain. The dsn value is obtained from the .env file. In your .env file, create a value for 'MONGODB_URI and set it to the value of your MongoDB Atlas connection string, like below:
MONGODB_URI="<>"
DB_CONNECTION=mongodb
Authentication with Laravel Breeze
We have installed and configured our application to work with MongoDB. Let’s proceed to authentication. Laravel simplifies the implementation of authentication by providing packages like Laravel Breeze, Laravel Fortify, and Laravel Jetstream. In this tutorial, we will use Laravel Breeze for our authentication. We need to install it using Composer with the command below:
composer require laravel/breeze --dev
Once the installation is complete, proceed by running the next set of commands.
php artisan key:generate
php artisan breeze:install
php artisan migrate
php artisan db:seed
npm install
npm run dev
This will prompt you to choose your preferred stack and testing package like the sample below. For the purpose of this article, we will select the first option (Blade and Alpine).
┌ Which Breeze stack would you like to install? ───────────────┐
│ > ● Blade with Alpine │
│ ○ Livewire (Volt Class API) with Alpine │
│ ○ Livewire (Volt Functional API) with Alpine │
│ ○ React with Inertia │
│ ○ Vue with Inertia │
│ ○ API only
Afterward, it will add authentication views, routes, controllers, and other related resources to your application.
At this point, let’s serve the project using Laravel’s built-in server and confirm that everything works properly. Serve your project using the command below:
php artisan serve
The project should be served at 127.0.0.1:8000. In case the port 8000 is already in use, Laravel will switch to a new available port. If everything was done right, your screen should look like the image below

You can log in using these credentials: email is “test@example.com” and password is “password”.
To make sure that the Laravel MongoDB package was configured properly, let’s create a route to ping our MongoDB cluster. Add the following to route/web.php.
Route::get('/ping', function (Request $request) {
$connection = DB::connection('mongodb');
try {
$connection->command(['ping' => 1]);
$msg = 'MongoDB is accessible!';
} catch (Exception $e) {
$msg = 'You are not connected to MongoDB. Error: ' . $e->getMessage();
}
return ['msg' => $msg];
});
Visit this route in your browser. Your screen should look like the image below, if everything was done right:
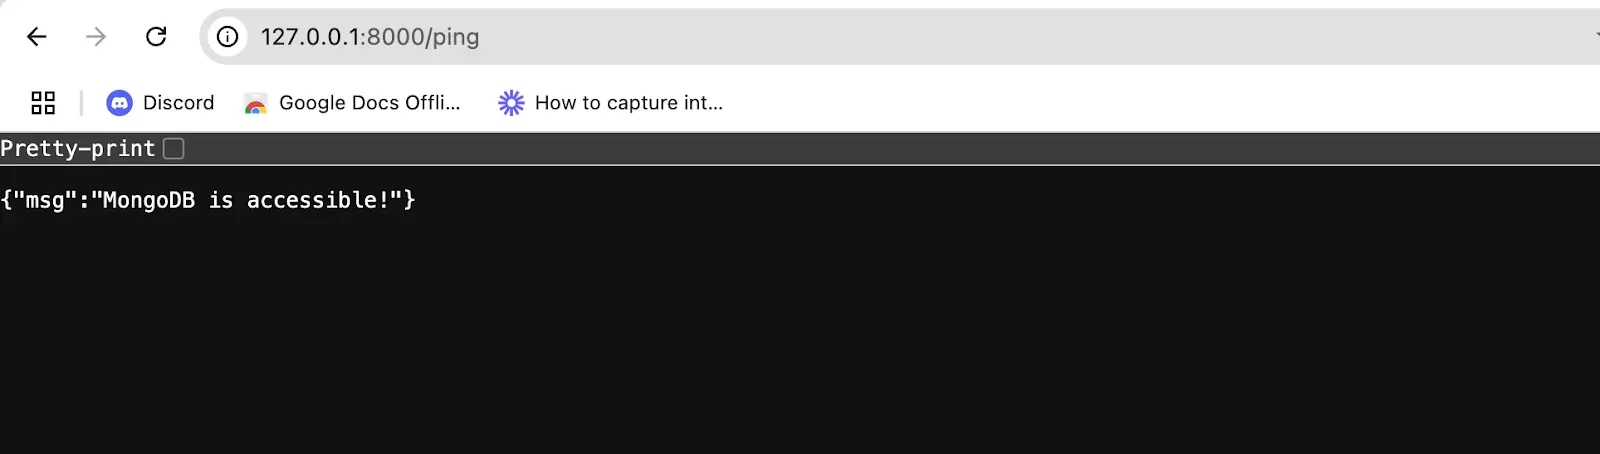
Creating the task reminder system
Let’s create our model and controller for the task scheduling feature. Use the command below to do so:
php artisan make:model Task --resource --controller
The command above will create the Task model in the app/Models directory and the TaskController in the app/Http/Controllers directory with resource methods.
Let’s create a route for the TaskController. Navigate to routes/web.php and add the following to the file.
use AppHttpControllersTaskController;
Route::resource('tasks', TaskController::class)->middleware('auth');
Next, let’s modify the content of the task model to our needs. Navigate to app/Models/Task.php and replace the content with the following:
<?php
namespace AppModels;
use MongoDBLaravelEloquentModel;
class Task extends Model
{
protected $connection = 'mongodb';
protected $table = 'tasks';
protected $fillable = [
'title', 'description', 'due_date', 'email', 'reminder_time', 'last_notification_date'
];
}
The code above is our task model.
- The
use MongoDBLaravelEloquentModelstatement after the namespace is specific to MongoDB models. It overrides the Eloquent features implemented with SQL, using MongoDB queries. - The
protected $table = 'tasks'is optional. It is the name of the MongoDB collection that is used to tore the documents from this model. - The
protected $fillable = ['title', 'description', 'due_date', 'email', 'reminder_time']specifies the mass assignable properties.
One of the unique features of MongoDB is that it doesn’t need migrations like relational databases do. This means you can add new fields directly to your documents without having to update the model or create migrations. This is particularly helpful in handling dynamic data.
Next, let’s modify our controller. Navigate to app/Http/Controllers/TaskController.php and update the content with the code below:
<?php
namespace AppHttpControllers;
use AppModelsTask;
use CarbonCarbon;
use IlluminateHttpRequest;
class TaskController extends Controller
{
/**
* Display a listing of the resource.
*/
public function index()
{
$tasks = Task::where('email', auth()->user()->email)->get();
return view('tasks.index', compact('tasks'));
}
/**
* Show the form for creating a new resource.
*/
public function create()
{
return view('tasks.create');
}
/**
* Store a newly created resource in storage.
*/
public function store(Request $request)
{
$request->validate([
'title' => 'required|string|max:255',
'description' => 'nullable|string',
'due_date' => 'required|date',
'reminder_time' => 'required|date',
]);
$data = $request->all();
$data['due_date'] = Carbon::parse($request->due_date);
$data['reminder_time'] = Carbon::parse($request->reminder_time);
$data['email'] = auth()->user()->email;
$data['last_notification_date'] = null;
Task::create($data);
return redirect()->route('tasks.index')->with('success', 'Task created successfully.');
}
/**
* Display the specified resource.
*/
public function show(string $id)
{
//
}
/**
* Show the form for editing the specified resource.
*/
public function edit(string $id)
{
$tasks = Task::where('id', $id)->get();
return view('tasks.edit', ['tasks' => $tasks]);
}
/**
* Update the specified resource in storage.
*/
public function update(Request $request, string $id)
{
$task = Task::findOrFail($id);
$data = $request->all();
$data['due_date'] = Carbon::parse($request->due_date)->format('Y-m-d H:i:s');
$data['reminder_time'] = Carbon::parse($request->reminder_time)->format('Y-m-d H:i:s');
$task->update($data);
return redirect()->route('tasks.index')->with('success', 'Task updated successfully.');
}
/**
* Remove the specified resource from storage.
*/
public function destroy(string $id)
{
$task = Task::findOrFail($id);
$task->delete();
Return redirect()->route('tasks.index')->with('success', 'Task deleted successfully.');
}
}
Our newly created TaskController above contains code that handles the CRUD operations of our task model. The index method retrieves all tasks belonging to the logged-in user and sends them to the index.blade.php file to be displayed on the front end.
The create method returns the form view for creating a new task, while the store method validates the input, assigns the logged-in user’s email to the task, and saves it to the database.
For updates, the edit method retrieves the specific task to be edited and displays it in an edit form. When this form is submitted, it calls the update method which saves the edited task in our MongoDB task collection.
The destroy method deletes a specific task. Each operation redirects back to the task’s list with a success message for user feedback.
Let’s create view files for our task scheduler. In the resources/views directory, create a folder named /tasks and create the following files in it:
- create.blade.php
- edit.blade.php
- index.blade.php
Navigate to resources/views/create.blade.php and replace the content of the page with the following:
<x-app-layout>
<x-slot name="header">
<h2 class="font-semibold text-xl text-gray-800 leading-tight">
{{ __('Tasks') }}
</h2>
</x-slot>
<div class="py-12">
<div class="max-w-7xl mx-auto sm:px-6 lg:px-8">
<div class="bg-white overflow-hidden shadow-sm sm:rounded-lg">
<div class="container mx-auto p-4">
<h2 class="text-2xl font-bold mb-4">Create New Task</h2>
<form action="{{ route('tasks.store') }}" method="POST">
@csrf
<div class="mb-4">
<label for="title" class="block text-gray-700">Title:</label>
<input type="text" name="title" id="title" required class="border border-gray-300 p-2 w-full" value="{{ old('title') }}">
@error('title')
<p class="text-red-500">{{ $message }}</p>
@enderror
</div>
<div class="mb-4">
<label for="description" class="block text-gray-700">Description:</label>
<textarea name="description" id="description" class="border border-gray-300 p-2 w-full">{{ old('description') }}</textarea>
</div>
<div class="mb-4">
<label for="due_date" class="block text-gray-700">Due Date:</label>
<input type="date" name="due_date" id="due_date" required class="border border-gray-300 p-2 w-full" value="{{ old('due_date') }}">
@error('due_date')
<p class="text-red-500">{{ $message }}</p>
@enderror
</div>
<div class="mb-4">
<label for="reminder_time" class="block text-gray-700">Reminder Time:</label>
<input type="datetime-local" name="reminder_time" id="reminder_time" class="border border-gray-300 p-2 w-full" value="{{ old('reminder_time') }}">
</div>
<button type="submit" class="bg-green-600 text-white text-gray-399 p-2 border rounded">Create Task</button>
</form>
</div>
</div>
</div>
</div>
</x-app-layout>
In the code above, we added HTML for the create form. The form contains text input for title and description and date and time input for due date and reminder time. If your code is right, your screen should look like the image below.
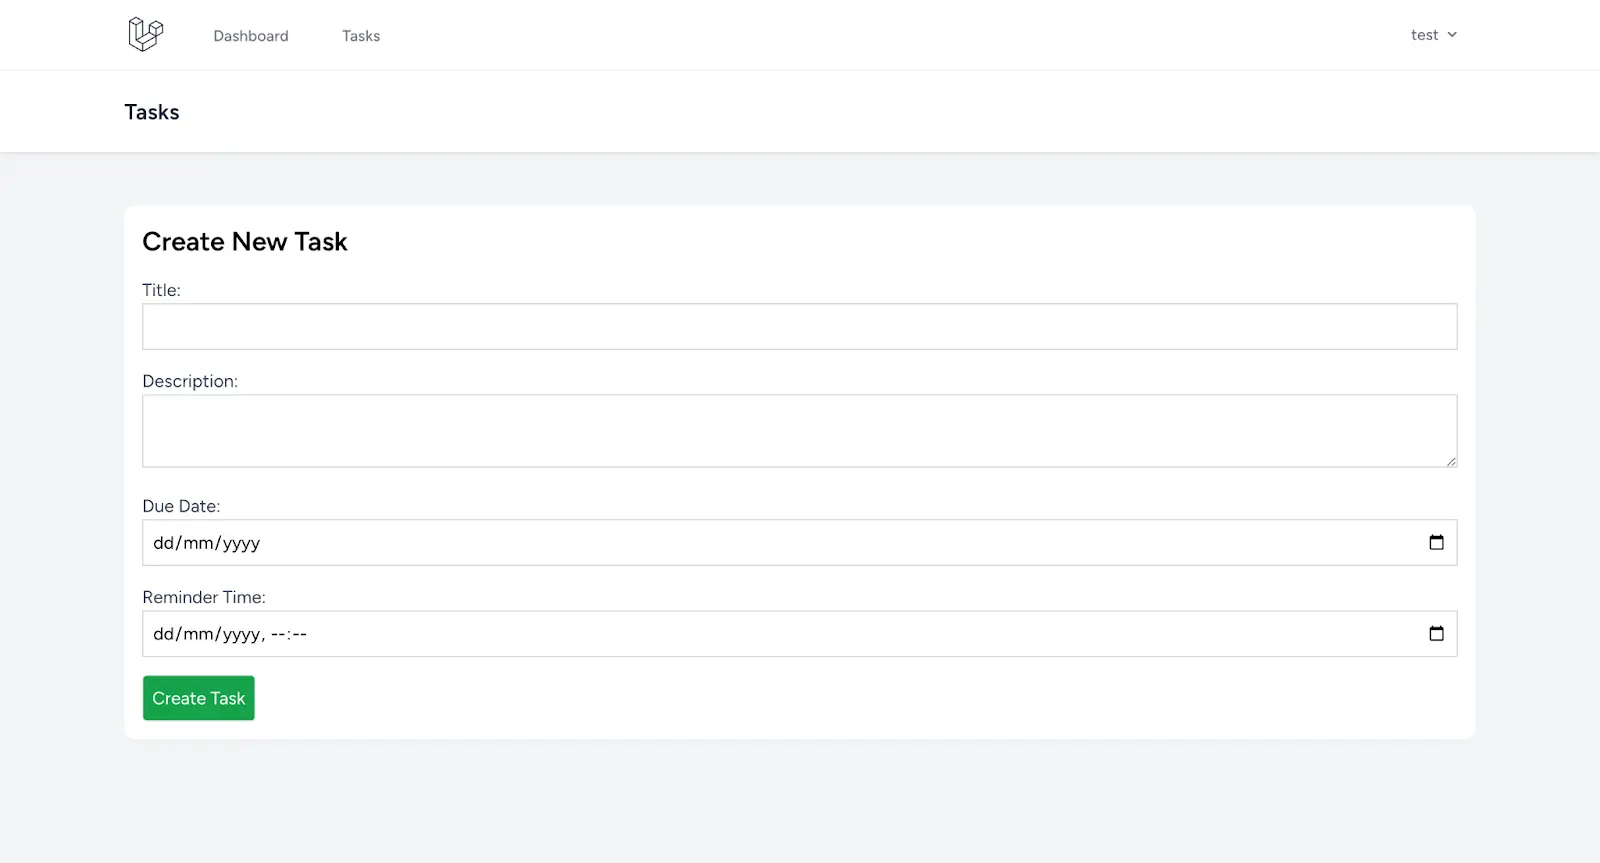
Do the same for edit.blade.php. Navigate to resources/views/edit.blade.php and add the code below to the content of the page:
<x-app-layout>
<x-slot name="header">
<h2 class="font-semibold text-xl text-gray-800 leading-tight">
{{ __('Edit Task') }}
</h2>
</x-slot>
<div class="py-12">
<div class="max-w-7xl mx-auto sm:px-6 lg:px-8">
<div class="bg-white overflow-hidden shadow-sm sm:rounded-lg">
<div class="p-6 text-gray-900">
@foreach($tasks as $task)
<form action="{{ route('tasks.update', $task->id) }}" method="POST">
@csrf
@method('PUT')
<div class="mb-4">
<label for="title" class="block text-gray-700">Title:</label>
<input type="text" name="title" id="title" required class="border border-gray-300 p-2 w-full" value="{{ old('title', $task->title) }}">
@error('title')
<p class="text-red-500">{{ $message }}</p>
@enderror
</div>
<div class="mb-4">
<label for="description" class="block text-gray-700">Description:</label>
<textarea name="description" id="description" class="border border-gray-300 p-2 w-full">{{ old('description', $task->description) }}</textarea>
</div>
<div class="mb-4">
<label for="due_date" class="block text-gray-700">Due Date:</label>
<input type="date" name="due_date" id="due_date" required class="border border-gray-300 p-2 w-full" value="{{ old('due_date', $task->due_date) }}">
@error('due_date')
<p class="text-red-500">{{ $message }}</p>
@enderror
</div>
<div class="mb-4">
<label for="reminder_time" class="block text-gray-700">Reminder Time:</label>
<input type="datetime-local" name="reminder_time" id="reminder_time" class="border border-gray-300 p-2 w-full" value="{{ old('reminder_time', $task->reminder_time) }}">
</div>
<button type="submit" class="bg-blue-500 text-white p-2 rounded">Update Task</button>
</form>
@endforeach
</div>
</div>
</div>
</div>
</x-app-layout>
The edit contains the same input fields as the create form above. It is loaded with the data of the task currently being edited.
Lastly, navigate to resources/views/index.blade.php and replace the content with the code below:
<x-app-layout>
<x-slot name="header">
<h2 class="font-semibold text-xl text-gray-800 leading-tight">
{{ __('Tasks') }}
</h2>
</x-slot>
<div class="py-12">
<div class="max-w-7xl mx-auto sm:px-6 lg:px-8">
<div class="bg-white overflow-hidden shadow-sm sm:rounded-lg">
<div class="p-6 text-gray-900">
<div class="mb-2">
<a href="{{ route('tasks.create') }}" class="p-2 border mb-4">Create New Task</a>
</div>
<ul class="mt-4">
@foreach ($tasks as $task)
<div class="mt-2">
<hr>
</div>
<li>
<h1 class="text-2xl">
<strong>{{ $task->title }}</strong> - Due: {{ $task->due_date }}
</h1>
<p class="text-gray-600">
{{ $task->description }}
</p>
<div class="flex gap-2 mt-4">
<div class="p-2 text-white bg-gray-700">
<a href="{{ route('tasks.edit', $task->id) }}">Edit</a>
</div>
<div class="p-2 text-white bg-red-700 rounded">
<form action="{{ route('tasks.destroy', $task->id) }}" method="POST" style="display:inline;">
@csrf
@method('DELETE')
<button type="submit">Delete</button>
</form>
</div>
</div>
</li>
@endforeach
</ul>
</div>
</div>
</div>
</div>
</x-app-layout>
In the code above, we have a link to the create form. It also loops through all the reminders and displays those belonging to this user.

Add route
Next, we need to add a link to the task feature from our application navigation. Open resouces/views/layouts/navigation.blade.php and add the following line of code just after the dashboard navigation link.
//...existing code ...
<div class="hidden space-x-8 sm:-my-px sm:ms-10 sm:flex">
<x-nav-link :href="route('tasks.index')":active="request()->routeIs('tasks.index')">
{{ __('Tasks') }}
</x-nav-link>
</div>
At this point, we should be able to test the CRUD operation of our task management system. Ensure that everything works correctly before moving on to the next section.
Setting reminders using Laravel task scheduling
Let’s proceed to implementing the reminder system for due tasks. To do this we will:
- Create a custom artisan command to send reminders through email.
- Register the command for automatic scheduling. Let’s create a custom artisan command using the command below:
php artisan make:command SendTaskReminders
Once the command is completed, update the content of app/Console/Commands/SendTaskReminders.php with the code below:
<?php
namespace AppConsoleCommands;
use AppModelsTask;
use CarbonCarbon;
use IlluminateConsoleCommand;
use IlluminateSupportFacadesMail;
class SendTaskReminders extends Command
{
/**
* The name and signature of the console command.
*
* @var string
*/
protected $signature = 'app:send-task-reminders';
/**
* The console command description.
*
* @var string
*/
protected $description = 'Command description';
/**
* Execute the console command.
*/
public function handle()
{
$now = Carbon::now();
$upcomingTasks = Task::where('last_notification_date', null)->get();
$upcomingTasks = Task::where('last_notification_date', null)
->where('reminder_time', '>=', $now->clone()->subMinutes(10))
->get();
foreach ($upcomingTasks as $task) {
$emailBody = <<<EOF
Hello,
This is a reminder for your task:
Title: {$task->title}
Description: {$task->description}
Due Date: {$task->due_date}
Please make sure to complete it on time!
Regards,
Your Task Reminder App
EOF;
Mail::raw($emailBody, function ($message) use ($task) {
$message->to($task->email)
->subject("Task Reminder: {$task->title}");
});
$task->last_notification_date = $now;
$task->save();
$this->info("Reminder email sent for task: {$task->title}");
}
return self::SUCCESS;
}
}
The main logic of our custom artisan command is written in the handle() method. From the code above, we get the current timestamp using Carbon::now().
Next, we query the database to get all the tasks where reminder_time is less than or equal to the current time (the value of $now) and where reminder_time is greater than or equal to 10 minutes before the time, with this line of code: 'reminder_time','>=',$now->clone()->subMinutes(10). In MongoDB, all dates are stored in UTC. Even if your server uses a different timezone, you don’t need to change it.
To throw more light, let’s assume that the current time is $now = 2024-10-22 15:00:00. The task reminder query fetches all tasks between 2024-10-22 14:50:00 and 2024-10-22 15:00:00. We fetch all tasks that are due in 10 minutes.
Then, we loop through the result and send reminders to the user emails of tasks that will be due in the next 10 minutes.
For the task scheduler to work properly, you must configure your application to send emails.
Mailtrap.io is a great tool for testing email sending. Get a detailed explanation of how to configure your application to send emails using Mailtrap.
Scheduling notifications for task reminders
To wrap it all up, we need to schedule the artisan command created above to run every minute. Think of this as a way to automatically run php artisan app:send-task-reminders every minute.
There are different approaches to scheduling a task in Laravel. In this tutorial, we are working with Laravel version 11.9, which is the most recent version at the time of this writing. To proceed, navigate to routes/console.php and add the following:
//...existing code ...
Schedule::command('app:send-task-reminders')->everyMinute();
To test that this works, run the command below:
php artisan schedule:run
On a production server, you will need to configure a cron job to run the php artisan schedule:run command at regular intervals.
In a Linux- or Unix-based server, you can open your cron configuration file using the command below:
crontab -e
Add the code below into the cron configuration tab:
* * * * * /usr/bin/php /path-to-your-project/artisan schedule:run >> /dev/null 2>&1
For this to work properly, replace /usr/bin/php with the path to your PHP binary and /path-to-your-project with the full path to your Laravel project on your server, then save and exit.
You can verify that everything works fine by typing this command below:
crontab -l
Conclusion
We have come to the end of this tutorial; great job if you followed along. Now, for a recap, in this tutorial, we walked through the process of creating a task scheduler in Laravel and MongoDB. Some of the key implementations were:
- Configuring a Laravel project to work with MongoDB.
- Implementing CRUD features for our tasks scheduler.
- Creating a custom Laravel artisan command for our reminder system.
- Scheduling a task to run the artisan command in intervals.
- Walking through the steps to configure the cron job on a Linux-based server.
Find the project on GitHub. Feel free to clone it, sign up for MongoDB Atlas, and customize it to your specific needs. For more support, join the MongoDB Developer Community.
MMS • RSS

HTF MI just released the Global Backend Database Software Market Study, a comprehensive analysis of the market that spans more than 143+ pages and describes the product and industry scope as well as the market prognosis and status for 2025–2032. The marketization process is being accelerated by the market study’s segmentation by important regions. The market is currently expanding its reach.
Major companies profiled in Backend Database Software Market are:
Oracle DB (USA), Microsoft SQL Server (USA), PostgreSQL (Open Source), MySQL (Oracle, USA), MongoDB (USA), Redis (USA), Cassandra (Apache, USA), MariaDB (USA), IBM Db2 (USA), Google Cloud Spanner (USA), AWS Aurora (USA), SAP HANA (Germany), Couchbase (USA), Firebird (Open Source), CockroachDB (USA)
𝐑𝐞𝐪𝐮𝐞𝐬𝐭 𝐏𝐃𝐅 𝐒𝐚𝐦𝐩𝐥𝐞 𝐂𝐨𝐩𝐲 𝐨𝐟 𝐑𝐞𝐩𝐨𝐫𝐭: (𝐈𝐧𝐜𝐥𝐮𝐝𝐢𝐧𝐠 𝐅𝐮𝐥𝐥 𝐓𝐎𝐂, 𝐋𝐢𝐬𝐭 𝐨𝐟 𝐓𝐚𝐛𝐥𝐞𝐬 & 𝐅𝐢𝐠𝐮𝐫𝐞𝐬, 𝐂𝐡𝐚𝐫𝐭) @
👉 https://www.htfmarketinsights.com/sample-report/4361127-backend-database-software-market?utm_source=Akash_NewsTrail&utm_id=Akash
HTF Market Intelligence projects that the global Backend Database Software market will expand at a compound annual growth rate (CAGR) of 6.5% from 2025 to 2032, from USD 85 Billion in 2025 to USD 140 Billion by 2032.
Our Report Covers the Following Important Topics:
𝐁𝐲 𝐓𝐲𝐩𝐞:
Relational, NoSQL, Cloud-native, In-memory, Graph
𝐁𝐲 𝐀𝐩𝐩𝐥𝐢𝐜𝐚𝐭𝐢𝐨𝐧:
Enterprise apps, Web backends, Analytics, IoT, Mobile apps
Definition:
Backend database software is used to store, manage, and retrieve structured data for applications, typically running on servers with SQL or NoSQL architectures, providing scalability, performance, and data integrity in software systems.
Dominating Region:
North America
Fastest-Growing Region:
Asia‑Pacific
Market Trends:
- Distributed SQL/NoSQL systems, Serverless DB functions, Auto‑sharding, Graph DB support, Schema‑less engines
Market Drivers:
- Data performance scaling need, Cloud‑native app support, Multi‑tenant demand, OLAP/OLTP mix requirement
Market Challenges:
- ACID vs CAP tradeoffs, Schema evolution drift, Multi‑cloud replication latency
Have different Market Scope & Business Objectives; Enquire for customized study: https://www.htfmarketinsights.com/report/4361127-backend-database-software-market?utm_source=Akash_NewsTrail&utm_id=Akash
The titled segments and sub-section of the market are illuminated below:
In-depth analysis of Backend Database Software market segments by Types: Relational, NoSQL, Cloud-native, In-memory, Graph
Detailed analysis of Career &Education Counselling market segments by Applications: Enterprise apps, Web backends, Analytics, IoT, Mobile apps
Global Backend Database Software Market -𝐑𝐞𝐠𝐢𝐨𝐧𝐚𝐥 𝐀𝐧𝐚𝐥𝐲𝐬𝐢𝐬
• North America: United States of America (US), Canada, and Mexico.
• South & Central America: Argentina, Chile, Colombia, and Brazil.
• Middle East & Africa: Kingdom of Saudi Arabia, United Arab Emirates, Turkey, Israel, Egypt, and South Africa.
• Europe: the UK, France, Italy, Germany, Spain, Nordics, BALTIC Countries, Russia, Austria, and the Rest of Europe.
• Asia: India, China, Japan, South Korea, Taiwan, Southeast Asia (Singapore, Thailand, Malaysia, Indonesia, Philippines & Vietnam, etc.) & Rest
• Oceania: Australia & New Zealand
Buy Now Latest Edition of Backend Database Software Market Report 👉 https://www.htfmarketinsights.com/buy-now?format=1&report=4361127?utm_source=Akash_NewsTrail&utm_id=Akash
Backend Database Software Market Research Objectives:
– Focuses on the key manufacturers, to define, pronounce and examine the value, sales volume, market share, market competition landscape, SWOT analysis, and development plans in the next few years.
– To share comprehensive information about the key factors influencing the growth of the market (opportunities, drivers, growth potential, industry-specific challenges and risks).
– To analyze the with respect to individual future prospects, growth trends and their involvement to the total market.
– To analyze reasonable developments such as agreements, expansions new product launches, and acquisitions in the market.
– To deliberately profile the key players and systematically examine their growth strategies.
FIVE FORCES & PESTLE ANALYSIS:
Five forces analysis—the threat of new entrants, the threat of substitutes, the threat of competition, and the bargaining power of suppliers and buyers—are carried out to better understand market circumstances.
• Political (Political policy and stability as well as trade, fiscal, and taxation policies)
• Economical (Interest rates, employment or unemployment rates, raw material costs, and foreign exchange rates)
• Social (Changing family demographics, education levels, cultural trends, attitude changes, and changes in lifestyles)
• Technological (Changes in digital or mobile technology, automation, research, and development)
• Legal (Employment legislation, consumer law, health, and safety, international as well as trade regulation and restrictions)
• Environmental (Climate, recycling procedures, carbon footprint, waste disposal, and sustainability)
Get customized report 👉 https://www.htfmarketinsights.com/customize/4361127-backend-database-software-market?utm_source=Akash_NewsTrail&utm_id=Akash
Points Covered in Table of Content of Global Backend Database Software Market:
Chapter 01 – Backend Database Software Executive Summary
Chapter 02 – Market Overview
Chapter 03 – Key Success Factors
Chapter 04 – Global Backend Database Software Market – Pricing Analysis
Chapter 05 – Global Backend Database Software Market Background or History
Chapter 06 – Global Backend Database Software Market Segmentation (e.g. Type, Application)
Chapter 07 – Key and Emerging Countries Analysis Worldwide Backend Database Software Market
Chapter 08 – Global Backend Database Software Market Structure & worth Analysis
Chapter 09 – Global Backend Database Software Market Competitive Analysis & Challenges
Chapter 10 – Assumptions and Acronyms
Chapter 11 – Backend Database Software Market Research Method Backend Database Software
Thank you for reading this post. You may also obtain report versions by area, such as North America, LATAM, Europe, Japan, Australia, or Southeast Asia, or by chapter.
About Author:
HTF Market Intelligence is a leading market research company providing end-to-end syndicated and custom market reports, consulting services, and insightful information across the globe. With over 15,000+ reports from 27 industries covering 60+ geographies, value research report, opportunities, and cope with the most critical business challenges, and transform businesses. Analysts at HTF MI focus on comprehending the unique needs of each client to deliver insights that are most suited to their particular requirements.
Contact Us:
Nidhi Bhawsar (PR & Marketing Manager)
HTF Market Intelligence Consulting Private Limited
Phone: +15075562445
sales@htfmarketintelligence.com
MiniMax Releases M1: A 456B Hybrid-Attention Model for Long-Context Reasoning and Software Tasks
MMS • Robert Krzaczynski

MiniMax has introduced MiniMax-M1, an open-weight language model designed for long-context reasoning and tool use. Based on the earlier MiniMax-Text-01, M1 uses a hybrid Mixture-of-Experts (MoE) architecture and a new “lightning attention” mechanism. The model has a total capacity of 456 billion parameters, with 45.9 billion active per token, and supports context lengths of up to 1 million tokens.
M1 distinguishes itself through its efficient use of compute and support for long-context reasoning. Its lightning attention mechanism reduces test-time computation, requiring only 25% of the FLOPs used by DeepSeek R1 for sequences of 100K tokens. The model was trained using large-scale reinforcement learning across a range of domains, including mathematical problem-solving and software engineering environments.
Two versions of the model are available. The models are evaluated using a custom RL scaling approach. Notably, MiniMax introduces CISPO, a novel RL algorithm that clips importance sampling weights rather than token updates—reportedly improving stability and performance over traditional variants.
Across benchmarks, MiniMax-M1-80K consistently ranks at or near the top among open-weight models, with strong results in:
- Long-context tasks (OpenAI-MRCR 128K: 73.4%, LongBench-v2: 61.5%)
- Software engineering (SWE-bench Verified: 56.0%)
- Tool use (TAU-bench airline: 62.0%, retail: 63.5%)
- Reasoning-heavy math benchmarks (AIME 2024: 86.0%)
One Reddit user commented on its standout capabilities:
This looks pretty great. Especially for function calling (Tau-bench) and long context, this seems like SOTA for open-weights. The latter by some big margin, which I don’t even find unbelievable because their old non-reasoning model was also great for this.
However, others pointed to limitations in practice. For example, dubesor86 shared:
It’s unusable, though. I had it play chess matches (usually takes a few minutes), and I had to have it run all night, and it still wasn’t done by the time I woke up. All the scores in the world mean nothing if the usability is zero.
MiniMax-M1 also supports structured function calling, making it suitable for agent frameworks. The model is available in two versions (40K and 80K) via HuggingFace. For deployment, the team recommends vLLM, offering optimized serving, memory management, and batching performance. Developers can also experiment via the MiniMax MCP Server, which bundles API access and capabilities such as video and image generation, speech synthesis, and voice cloning.
MMS • RSS
The popularity of Laravel has improved recently as more developers have started to adopt the technology. Laravel has an easy-to-understand syntax that boosts productivity by letting the developer focus on the core features of their application and not bother with repetitive tasks like authentication and sending emails. It has a very vibrant community of users and great learning materials.
Freshly created Laravel applications are configured to use relational databases. The purpose of this tutorial is to show how to use MongoDB in a Laravel application. We will build a simple task reminder system to achieve this.
Prerequisites
The following tools and technologies are required to follow along effectively with this tutorial.
- A free MongoDB Atlas cluster
- PHP and Composer
- NPM
- Basic knowledge of the Laravel framework
- Familiarity with MongoDB and NoSQL databases
Environment setup
To work with MongoDB, we need to configure our development environment. We need to ensure that all the necessary development dependencies are installed and configured properly. Make sure you have the following installed.
- PHP and the MongoDB extension
- Composer
Project setup
To get started building our reminder system, the first thing to do is create a new Laravel project. We can do so using the composer with the command below:
composer create-project laravel/laravel LaravelMongodbProject
cd LaravelMongodbProject
Install MongoDB Laravel package
A freshly created Laravel project when installed comes with default configurations for relational databases like MySql and PostgreSQL. MongoDB does not work in Laravel by default. We need to install the Laravel MongoDB package and also do a little configuration in config/database.php. Proceed to install the package using the command below:
composer require mongodb/laravel-mongodb
Configure database
Once the installation of the Laravel MongoDB package is completed, the next step is to add our MongoDB database connection to our config/database.php file to complete the configuration. Copy the code below and paste it in the connections array that contains configurations for other database types.
return [
'connections' => [
'mongodb' => [
'driver' => 'mongodb',
'dsn' => env('MONGODB_URI'),
'database' => 'YOUR_DATABASE_NAME',
],
//You can keep other existing connections
],
Let’s take a moment to explain. The dsn value is obtained from the .env file. In your .env file, create a value for 'MONGODB_URI and set it to the value of your MongoDB Atlas connection string, like below:
MONGODB_URI="<>"
DB_CONNECTION=mongodb
Authentication with Laravel Breeze
We have installed and configured our application to work with MongoDB. Let’s proceed to authentication. Laravel simplifies the implementation of authentication by providing packages like Laravel Breeze, Laravel Fortify, and Laravel Jetstream. In this tutorial, we will use Laravel Breeze for our authentication. We need to install it using Composer with the command below:
composer require laravel/breeze --dev
Once the installation is complete, proceed by running the next set of commands.
php artisan key:generate
php artisan breeze:install
php artisan migrate
php artisan db:seed
npm install
npm run dev
This will prompt you to choose your preferred stack and testing package like the sample below. For the purpose of this article, we will select the first option (Blade and Alpine).
┌ Which Breeze stack would you like to install? ───────────────┐
│ > ● Blade with Alpine │
│ ○ Livewire (Volt Class API) with Alpine │
│ ○ Livewire (Volt Functional API) with Alpine │
│ ○ React with Inertia │
│ ○ Vue with Inertia │
│ ○ API only
Afterward, it will add authentication views, routes, controllers, and other related resources to your application.
At this point, let’s serve the project using Laravel’s built-in server and confirm that everything works properly. Serve your project using the command below:
php artisan serve
The project should be served at 127.0.0.1:8000. In case the port 8000 is already in use, Laravel will switch to a new available port. If everything was done right, your screen should look like the image below
You can log in using these credentials: email is “test@example.com” and password is “password”.
To make sure that the Laravel MongoDB package was configured properly, let’s create a route to ping our MongoDB cluster. Add the following to route/web.php.
Route::get('/ping', function (Request $request) {
$connection = DB::connection('mongodb');
try {
$connection->command(['ping' => 1]);
$msg = 'MongoDB is accessible!';
} catch (Exception $e) {
$msg = 'You are not connected to MongoDB. Error: ' . $e->getMessage();
}
return ['msg' => $msg];
});
Visit this route in your browser. Your screen should look like the image below, if everything was done right:
Creating the task reminder system
Let’s create our model and controller for the task scheduling feature. Use the command below to do so:
php artisan make:model Task --resource --controller
The command above will create the Task model in the app/Models directory and the TaskController in the app/Http/Controllers directory with resource methods.
Let’s create a route for the TaskController. Navigate to routes/web.php and add the following to the file.
use AppHttpControllersTaskController;
Route::resource('tasks', TaskController::class)->middleware('auth');
Next, let’s modify the content of the task model to our needs. Navigate to app/Models/Task.php and replace the content with the following:
<?php
namespace AppModels;
use MongoDBLaravelEloquentModel;
class Task extends Model
{
protected $connection = 'mongodb';
protected $table = 'tasks';
protected $fillable = [
'title', 'description', 'due_date', 'email', 'reminder_time', 'last_notification_date'
];
}
The code above is our task model.
- The
use MongoDBLaravelEloquentModelstatement after the namespace is specific to MongoDB models. It overrides the Eloquent features implemented with SQL, using MongoDB queries. - The
protected $table = 'tasks'is optional. It is the name of the MongoDB collection that is used to tore the documents from this model. - The
protected $fillable = ['title', 'description', 'due_date', 'email', 'reminder_time']specifies the mass assignable properties.
One of the unique features of MongoDB is that it doesn’t need migrations like relational databases do. This means you can add new fields directly to your documents without having to update the model or create migrations. This is particularly helpful in handling dynamic data.
Next, let’s modify our controller. Navigate to app/Http/Controllers/TaskController.php and update the content with the code below:
<?php
namespace AppHttpControllers;
use AppModelsTask;
use CarbonCarbon;
use IlluminateHttpRequest;
class TaskController extends Controller
{
/**
* Display a listing of the resource.
*/
public function index()
{
$tasks = Task::where('email', auth()->user()->email)->get();
return view('tasks.index', compact('tasks'));
}
/**
* Show the form for creating a new resource.
*/
public function create()
{
return view('tasks.create');
}
/**
* Store a newly created resource in storage.
*/
public function store(Request $request)
{
$request->validate([
'title' => 'required|string|max:255',
'description' => 'nullable|string',
'due_date' => 'required|date',
'reminder_time' => 'required|date',
]);
$data = $request->all();
$data['due_date'] = Carbon::parse($request->due_date);
$data['reminder_time'] = Carbon::parse($request->reminder_time);
$data['email'] = auth()->user()->email;
$data['last_notification_date'] = null;
Task::create($data);
return redirect()->route('tasks.index')->with('success', 'Task created successfully.');
}
/**
* Display the specified resource.
*/
public function show(string $id)
{
//
}
/**
* Show the form for editing the specified resource.
*/
public function edit(string $id)
{
$tasks = Task::where('id', $id)->get();
return view('tasks.edit', ['tasks' => $tasks]);
}
/**
* Update the specified resource in storage.
*/
public function update(Request $request, string $id)
{
$task = Task::findOrFail($id);
$data = $request->all();
$data['due_date'] = Carbon::parse($request->due_date)->format('Y-m-d H:i:s');
$data['reminder_time'] = Carbon::parse($request->reminder_time)->format('Y-m-d H:i:s');
$task->update($data);
return redirect()->route('tasks.index')->with('success', 'Task updated successfully.');
}
/**
* Remove the specified resource from storage.
*/
public function destroy(string $id)
{
$task = Task::findOrFail($id);
$task->delete();
Return redirect()->route('tasks.index')->with('success', 'Task deleted successfully.');
}
}
Our newly created TaskController above contains code that handles the CRUD operations of our task model. The index method retrieves all tasks belonging to the logged-in user and sends them to the index.blade.php file to be displayed on the front end.
The create method returns the form view for creating a new task, while the store method validates the input, assigns the logged-in user’s email to the task, and saves it to the database.
For updates, the edit method retrieves the specific task to be edited and displays it in an edit form. When this form is submitted, it calls the update method which saves the edited task in our MongoDB task collection.
The destroy method deletes a specific task. Each operation redirects back to the task’s list with a success message for user feedback.
Let’s create view files for our task scheduler. In the resources/views directory, create a folder named /tasks and create the following files in it:
- create.blade.php
- edit.blade.php
- index.blade.php
Navigate to resources/views/create.blade.php and replace the content of the page with the following:
<x-app-layout>
<x-slot name="header">
<h2 class="font-semibold text-xl text-gray-800 leading-tight">
{{ __('Tasks') }}
</h2>
</x-slot>
<div class="py-12">
<div class="max-w-7xl mx-auto sm:px-6 lg:px-8">
<div class="bg-white overflow-hidden shadow-sm sm:rounded-lg">
<div class="container mx-auto p-4">
<h2 class="text-2xl font-bold mb-4">Create New Task</h2>
<form action="{{ route('tasks.store') }}" method="POST">
@csrf
<div class="mb-4">
<label for="title" class="block text-gray-700">Title:</label>
<input type="text" name="title" id="title" required class="border border-gray-300 p-2 w-full" value="{{ old('title') }}">
@error('title')
<p class="text-red-500">{{ $message }}</p>
@enderror
</div>
<div class="mb-4">
<label for="description" class="block text-gray-700">Description:</label>
<textarea name="description" id="description" class="border border-gray-300 p-2 w-full">{{ old('description') }}</textarea>
</div>
<div class="mb-4">
<label for="due_date" class="block text-gray-700">Due Date:</label>
<input type="date" name="due_date" id="due_date" required class="border border-gray-300 p-2 w-full" value="{{ old('due_date') }}">
@error('due_date')
<p class="text-red-500">{{ $message }}</p>
@enderror
</div>
<div class="mb-4">
<label for="reminder_time" class="block text-gray-700">Reminder Time:</label>
<input type="datetime-local" name="reminder_time" id="reminder_time" class="border border-gray-300 p-2 w-full" value="{{ old('reminder_time') }}">
</div>
<button type="submit" class="bg-green-600 text-white text-gray-399 p-2 border rounded">Create Task</button>
</form>
</div>
</div>
</div>
</div>
</x-app-layout>
In the code above, we added HTML for the create form. The form contains text input for title and description and date and time input for due date and reminder time. If your code is right, your screen should look like the image below.
Do the same for edit.blade.php. Navigate to resources/views/edit.blade.php and add the code below to the content of the page:
<x-app-layout>
<x-slot name="header">
<h2 class="font-semibold text-xl text-gray-800 leading-tight">
{{ __('Edit Task') }}
</h2>
</x-slot>
<div class="py-12">
<div class="max-w-7xl mx-auto sm:px-6 lg:px-8">
<div class="bg-white overflow-hidden shadow-sm sm:rounded-lg">
<div class="p-6 text-gray-900">
@foreach($tasks as $task)
<form action="{{ route('tasks.update', $task->id) }}" method="POST">
@csrf
@method('PUT')
<div class="mb-4">
<label for="title" class="block text-gray-700">Title:</label>
<input type="text" name="title" id="title" required class="border border-gray-300 p-2 w-full" value="{{ old('title', $task->title) }}">
@error('title')
<p class="text-red-500">{{ $message }}</p>
@enderror
</div>
<div class="mb-4">
<label for="description" class="block text-gray-700">Description:</label>
<textarea name="description" id="description" class="border border-gray-300 p-2 w-full">{{ old('description', $task->description) }}</textarea>
</div>
<div class="mb-4">
<label for="due_date" class="block text-gray-700">Due Date:</label>
<input type="date" name="due_date" id="due_date" required class="border border-gray-300 p-2 w-full" value="{{ old('due_date', $task->due_date) }}">
@error('due_date')
<p class="text-red-500">{{ $message }}</p>
@enderror
</div>
<div class="mb-4">
<label for="reminder_time" class="block text-gray-700">Reminder Time:</label>
<input type="datetime-local" name="reminder_time" id="reminder_time" class="border border-gray-300 p-2 w-full" value="{{ old('reminder_time', $task->reminder_time) }}">
</div>
<button type="submit" class="bg-blue-500 text-white p-2 rounded">Update Task</button>
</form>
@endforeach
</div>
</div>
</div>
</div>
</x-app-layout>
The edit contains the same input fields as the create form above. It is loaded with the data of the task currently being edited.
Lastly, navigate to resources/views/index.blade.php and replace the content with the code below:
<x-app-layout>
<x-slot name="header">
<h2 class="font-semibold text-xl text-gray-800 leading-tight">
{{ __('Tasks') }}
</h2>
</x-slot>
<div class="py-12">
<div class="max-w-7xl mx-auto sm:px-6 lg:px-8">
<div class="bg-white overflow-hidden shadow-sm sm:rounded-lg">
<div class="p-6 text-gray-900">
<div class="mb-2">
<a href="{{ route('tasks.create') }}" class="p-2 border mb-4">Create New Task</a>
</div>
<ul class="mt-4">
@foreach ($tasks as $task)
<div class="mt-2">
<hr>
</div>
<li>
<h1 class="text-2xl">
<strong>{{ $task->title }}</strong> - Due: {{ $task->due_date }}
</h1>
<p class="text-gray-600">
{{ $task->description }}
</p>
<div class="flex gap-2 mt-4">
<div class="p-2 text-white bg-gray-700">
<a href="{{ route('tasks.edit', $task->id) }}">Edit</a>
</div>
<div class="p-2 text-white bg-red-700 rounded">
<form action="{{ route('tasks.destroy', $task->id) }}" method="POST" style="display:inline;">
@csrf
@method('DELETE')
<button type="submit">Delete</button>
</form>
</div>
</div>
</li>
@endforeach
</ul>
</div>
</div>
</div>
</div>
</x-app-layout>
In the code above, we have a link to the create form. It also loops through all the reminders and displays those belonging to this user.
Add route
Next, we need to add a link to the task feature from our application navigation. Open resouces/views/layouts/navigation.blade.php and add the following line of code just after the dashboard navigation link.
//...existing code ...
<div class="hidden space-x-8 sm:-my-px sm:ms-10 sm:flex">
<x-nav-link :href="route('tasks.index')":active="request()->routeIs('tasks.index')">
{{ __('Tasks') }}
</x-nav-link>
</div>
At this point, we should be able to test the CRUD operation of our task management system. Ensure that everything works correctly before moving on to the next section.
Setting reminders using Laravel task scheduling
Let’s proceed to implementing the reminder system for due tasks. To do this we will:
- Create a custom artisan command to send reminders through email.
- Register the command for automatic scheduling. Let’s create a custom artisan command using the command below:
php artisan make:command SendTaskReminders
Once the command is completed, update the content of app/Console/Commands/SendTaskReminders.php with the code below:
<?php
namespace AppConsoleCommands;
use AppModelsTask;
use CarbonCarbon;
use IlluminateConsoleCommand;
use IlluminateSupportFacadesMail;
class SendTaskReminders extends Command
{
/**
* The name and signature of the console command.
*
* @var string
*/
protected $signature = 'app:send-task-reminders';
/**
* The console command description.
*
* @var string
*/
protected $description = 'Command description';
/**
* Execute the console command.
*/
public function handle()
{
$now = Carbon::now();
$upcomingTasks = Task::where('last_notification_date', null)->get();
$upcomingTasks = Task::where('last_notification_date', null)
->where('reminder_time', '>=', $now->clone()->subMinutes(10))
->get();
foreach ($upcomingTasks as $task) {
$emailBody = <<<EOF
Hello,
This is a reminder for your task:
Title: {$task->title}
Description: {$task->description}
Due Date: {$task->due_date}
Please make sure to complete it on time!
Regards,
Your Task Reminder App
EOF;
Mail::raw($emailBody, function ($message) use ($task) {
$message->to($task->email)
->subject("Task Reminder: {$task->title}");
});
$task->last_notification_date = $now;
$task->save();
$this->info("Reminder email sent for task: {$task->title}");
}
return self::SUCCESS;
}
}
The main logic of our custom artisan command is written in the handle() method. From the code above, we get the current timestamp using Carbon::now().
Next, we query the database to get all the tasks where reminder_time is less than or equal to the current time (the value of $now) and where reminder_time is greater than or equal to 10 minutes before the time, with this line of code: 'reminder_time','>=',$now->clone()->subMinutes(10). In MongoDB, all dates are stored in UTC. Even if your server uses a different timezone, you don’t need to change it.
To throw more light, let’s assume that the current time is $now = 2024-10-22 15:00:00. The task reminder query fetches all tasks between 2024-10-22 14:50:00 and 2024-10-22 15:00:00. We fetch all tasks that are due in 10 minutes.
Then, we loop through the result and send reminders to the user emails of tasks that will be due in the next 10 minutes.
For the task scheduler to work properly, you must configure your application to send emails.
Mailtrap.io is a great tool for testing email sending. Get a detailed explanation of how to configure your application to send emails using Mailtrap.
Scheduling notifications for task reminders
To wrap it all up, we need to schedule the artisan command created above to run every minute. Think of this as a way to automatically run php artisan app:send-task-reminders every minute.
There are different approaches to scheduling a task in Laravel. In this tutorial, we are working with Laravel version 11.9, which is the most recent version at the time of this writing. To proceed, navigate to routes/console.php and add the following:
//...existing code ...
Schedule::command('app:send-task-reminders')->everyMinute();
To test that this works, run the command below:
php artisan schedule:run
On a production server, you will need to configure a cron job to run the php artisan schedule:run command at regular intervals.
In a Linux- or Unix-based server, you can open your cron configuration file using the command below:
crontab -e
Add the code below into the cron configuration tab:
* * * * * /usr/bin/php /path-to-your-project/artisan schedule:run >> /dev/null 2>&1
For this to work properly, replace /usr/bin/php with the path to your PHP binary and /path-to-your-project with the full path to your Laravel project on your server, then save and exit.
You can verify that everything works fine by typing this command below:
crontab -l
Conclusion
We have come to the end of this tutorial; great job if you followed along. Now, for a recap, in this tutorial, we walked through the process of creating a task scheduler in Laravel and MongoDB. Some of the key implementations were:
- Configuring a Laravel project to work with MongoDB.
- Implementing CRUD features for our tasks scheduler.
- Creating a custom Laravel artisan command for our reminder system.
- Scheduling a task to run the artisan command in intervals.
- Walking through the steps to configure the cron job on a Linux-based server.
Find the project on GitHub. Feel free to clone it, sign up for MongoDB Atlas, and customize it to your specific needs. For more support, join the MongoDB Developer Community.
MMS • Renato Losio

AWS recently announced exportable public SSL/TLS certificates from AWS Certificate Manager, addressing a long-standing community request. This update allows users to export certificates along with their private keys for use beyond AWS-managed services.
Exportable public certificates enable customers to deploy ACM-issued certificates on Amazon EC2 instances, containers, and on-premises hosts, supporting AWS, hybrid, and multicloud workloads. Channy Yun, lead blogger at AWS, explains:
The exportable public certificates are valid for 395 days. There is a charge at time of issuance, and again at time of renewal. Public certificates exported from ACM are issued by Amazon Trust Services and are widely trusted by commonly used platforms such as Apple and Microsoft and popular web browsers such as Google Chrome and Mozilla Firefox.
Previously, users could only create public certificates within AWS Certificate Manager or import certificates issued by third-party certificate authorities (CAs) for use with AWS services, such as Elastic Load Balancing (ELB), CloudFront, and API Gateway. However, there was no way to export these certificates or create and manage certificates for external services or EC2 instances.
Corey Quinn, chief cloud economist at The Duckbill Group, published a long article, “AWS Certificate Manager Has Announced Exportable TLS Certificates, and I’m Mostly Okay With It,” reviewing the new feature. Quinn writes:
The pricing is quite reasonable. It costs either $15 per domain, or $149 for a wildcard certificate. That seemed a bit expensive to me, until I remembered what these things used to cost–and apparently still do. $400 per certificate isn’t at all uncommon from trustworthy vendors (…) ACM’s pricing is a comparative steal.
While many cloud practitioners question the benefits of the new solution over free options like Let’s Encrypt, Wojtek Szczepucha, solutions architect at AWS, highlights the main targets of the announcement:
Meeting regulations and compliance from a governance perspective. Simpler to manage from an operations perspective. It’s not invented out of thin air, but rather based on customers asking for it.
While the ability to export has been well received by the community and the new certificates are currently valid for over a year, the SSL/TLS certificate lifespans are expected to shrink to 200 days next year, 100 days in 2027, and only 47 days by 2029, as previously reported on InfoQ. When customers renew certificates on AWS Certificate Manager, they are charged for a new certificate issuance. Yun adds:
You can configure automatic renewal events for exportable public certificates by Amazon EventBridge to monitor certificate renewals and create automation to handle certificate deployment when renewals occur. (…) You can also renew these certificates on-demand.
Quinn warns:
At least at launch, this feature doesn’t support ACME for automatic renewal, which means there’s likely to be an inherently manual process to renew them. While you can automate the entire certificate issuance dance via AWS APIs, I’ve worked with enough enterprise software to know how this is going to play out: it’s a manual process.
Customers have to choose to make a certificate exportable before it’s issued, and there is no option to go back and retroactively export certificates that are already in use. This ensures that there is no default export of certificates with their private keys.
The ability to issue exportable public certificates was one of the main announcements of the recent re:Inforce conference. During the 3 days in Philadelphia, the cloud provider introduced other new security capabilities and services, including multi-party approval for logically air-gapped vaults in AWS Backup and the new AWS Security Hub for risk prioritization and response at scale.
MMS • A N M Bazlur Rahman

The University of Manchester’s Beehive Lab has released GPULlama3.java, marking the first Java-native implementation of Llama3 with automatic GPU acceleration. This project leverages TornadoVM to enable GPU-accelerated large language model inference without requiring developers to write CUDA or native code, potentially transforming how Java developers approach AI applications in enterprise environments.
At the heart of GPULlama3.java lies TornadoVM, an innovative heterogeneous programming framework that extends OpenJDK and GraalVM to automatically accelerate Java programs on GPUs, FPGAs, and multi-core CPUs. Unlike traditional GPU programming approaches that require developers to rewrite code in low-level languages like CUDA or OpenCL manually, TornadoVM enables GPU acceleration while keeping all code in pure Java.
According to the TornadoVM documentation, the system works by extending the Graal JIT compiler with specialized backends that translate Java bytecode to GPU-compatible code at runtime. When a method is marked for acceleration using annotations like @Parallel, TornadoVM’s compilation pipeline converts standard Java bytecode through Graal’s Intermediate Representation, applies GPU-specific optimizations, and generates target-specific code—whether that’s OpenCL C for cross-platform compatibility, PTX assembly for NVIDIA GPUs, or SPIR-V binary for Intel graphics.
// TornadoVM Task-Graph API example from documentation
TaskGraph taskGraph = new TaskGraph("computation")
.transferToDevice(DataTransferMode.FIRST_EXECUTION, data)
.task("process", MyClass::compute, input, output)
.transferToHost(DataTransferMode.EVERY_EXECUTION, output);

TornadoExecutionPlan executor = new TornadoExecutionPlan(taskGraph.snapshot());
executor.execute();
The TornadoVM programming guide demonstrates how developers can utilize hardware-agnostic APIs, enabling the same Java source code to run identically on various hardware accelerators. The TornadoVM runtime handles all device-specific optimizations, memory management, and data transfers automatically.
According to the GPULlama3.java repository, the project supports three primary backends, enabling execution across diverse hardware:
- NVIDIA GPUs: Full support through both OpenCL and PTX backends
- Intel GPUs: Including Arc discrete graphics and integrated HD Graphics through the OpenCL backend
- Apple Silicon: M1/M2/M3 support through OpenCL (though Apple has deprecated OpenCL in favour of Metal)
The repository indicates that configuration is handled through command-line flags:
# Run with GPU acceleration (from project README)
./llama-tornado --gpu --verbose-init --opencl --model beehive-llama-3.2-1b-instruct-fp16.gguf --prompt "Explain the benefits of GPU acceleration."
The GPULlama3.java implementation leverages modern Java features as documented in the repository:
- Java 21+ requirement for Vector API and Foreign Memory API support
- GGUF format support for single-file model deployment
- Quantization support for Q4_0 and Q8_0 formats to reduce memory requirements
The project builds upon Mukel’s original Llama3.java, adding GPU acceleration capabilities through TornadoVM integration.
GPULlama3.java joins other Java LLM projects, including:
- JLama: A modern LLM inference engine for Java with distributed capabilities
- Llama3.java: The original pure Java implementation focusing on CPU optimization
As noted in Quarkus’s blog on Java LLMs, the Java ecosystem is expanding its AI/ML capabilities, enabling developers to build LLM-powered applications without leaving the Java platform.
TornadoVM originated from research at the University of Manchester, aiming to make heterogeneous computing accessible to Java developers. The framework has been in development since 2013 and continues to progress with new backend support and optimizations.
GPULlama3.java is currently in beta, with ongoing performance optimization and benchmark collection. The performance on Apple Silicon remains suboptimal due to the deprecation of OpenCL. The TornadoVM team is developing a Metal backend to enhance support for Apple Silicon, optimizing transformer operations and broadening model architecture compatibility.
GPULlama3.java represents a significant advancement in bringing GPU-accelerated large language model (LLM) inference to the Java ecosystem. By leveraging TornadoVM, the project demonstrates that Java developers can utilize GPU acceleration without leaving their familiar programming environment. While performance optimization continues and the project remains in active development, it opens up new possibilities for Java-based AI applications in enterprise settings, where Java’s strengths in security, scalability, and maintainability are highly valued.
For developers interested in exploring GPU-accelerated LLM inference in Java, the project is open source and accessible on GitHub, complete with documentation and examples to help get started.
Article: The State Space Solution to Hallucinations: How State Space Models are Slicing the Competition
MMS • Albert Lie

Key Takeaways
- Transformers often hallucinate because they prioritize generating statistically likely text rather than factual accuracy.
- State Space Models (SSMs) offer a more reliable alternative for maintaining factual accuracy and context.
- SSMs process information sequentially, making them more efficient and less prone to hallucinations.
- Case studies on Perplexity and RoboMamba demonstrate the practical impact of SSMs in real-world scenarios.
- Practical guidelines are provided for implementing SSMs, including architecture selection, memory optimization, and real-time data integration.
AI-powered search tools like Perplexity and Arc are quickly becoming the go-to platforms for millions of users seeking instant answers. These tools promise quick, conversational responses with cited sources, making them feel more like talking to a smart assistant than using a traditional search engine. However, there is a growing problem: these systems often hallucinate.
In other words, they confidently make up facts, misquote sources, and recycle outdated information. For users, this means you might get an answer that sounds right, but is actually wrong. For example, Air Canada’s chatbot once confidently gave a fake refund policy to a grieving customer, leading the airline to be legally ordered to compensate him.
While many people blame bad data or unclear prompts, the real issue is deeper and tied to the architecture of most AI models: the transformer. In this article, I’ll explain why transformers struggle with hallucinations, how SSMs offer a promising solution, and what this shift could mean for the future of AI search.
Why Transformers Hallucinate
Transformers are the backbone of popular AI models like GPT-4. They predict the next word in a sentence by analyzing relationships between all words in a text at once. This attention mechanism is powerful for generating fluent and coherent text, but it comes with trade-offs:
Token Prediction,Not Truth Seeking
Transformers are designed to generate text that is statistically likely, not necessarily factually correct. In instances where there may be issues with the training data such as unfilled gaps or a level of noise or ambiguity, the model ends up filling these gaps with near guesses that may seem reasonably correct, but are not always well attuned to the context of the prompt or past information.
Computational Overload
Transformers analyze every word relationship, which becomes expensive and inefficient for long texts. As a result, they sometimes take shortcuts, losing important context and increasing the risk of errors.
Source Blindness
When given multiple sources, transformers can’t always tell which ones are reliable. This unreliability can lead to citing AI-generated or outdated information, as seen when Perplexity cited an AI-generated LinkedIn post about Kyoto festivals.
The end result is that AI search tools can act like persuasive storytellers. They are confidently wrong with answers that sound good but aren’t always accurate.
State Space Models: A Step Forward Towards Context Aware Accuracies
SSMs are emerging as a promising alternative to transformers for many sequence-based tasks. Unlike transformers, SSMs process information step-by-step, updating a memory bank as they go. Arguably, this approach resembles the typical framework of how humans read and retain information.
How SSMs Work
Using step-by-step analysis, SSMs read information one piece at a time, building understanding incrementally. This reduces the risk of context overload and helps the model keep track of important details.
SSMs are more efficient with computations. The memory and computational needs of SSMs grow linearly with the length of the input, rather than exponentially as with transformers. Therefore, SSMs can handle much longer texts or sequences without running into performance issues found in transformers.
SSMs store key facts in a controlled state, which helps minimize errors from conflicting information. In AI dialogue systems, maintaining a consistent internal state is crucial for ensuring coherent and contextually relevant interactions. For instance, Microsoft’s research into goal-oriented dialogue systems highlights the necessity of memory in complex tasks like vacation planning. These tasks involve multiple parameters and require the system to remember user preferences and constraints across the conversation. Without memory, the system would struggle to provide consistent responses, leading to user frustration.
A technical example of this is the MemoryBank mechanism, which enhances large language models (LLMs) by incorporating long-term memory. MemoryBank allows the model to recall relevant memories, update them over time, and adapt to a user’s personality. This is achieved through a memory updating mechanism inspired by the Ebbinghaus Forgetting Curve, enabling the AI to forget and reinforce memories based on their significance and the time elapsed.
Recent research shows that SSMs, especially models like Mamba, can perform competitively with transformers on many language tasks, particularly those involving long sequences or the need to track information over time. While transformers still have an edge in some areas, SSMs are closing the gap and offer unique advantages for certain applications.
Case Study 1: Perplexity’s Hallucination Trap
Perplexity, one of the leading AI-powered search engines, provides a clear example of why architecture matters. Despite using retrieval-augmented generation (RAG) to pull in real-time data, Perplexity has cited non-existent Vietnamese markets and AI-generated travel guides. This happens for several reasons.
By trusting unreliable sources, transformers treat all retrieved data equally, even if it’s AI-generated misinformation. Transformer models, such as BERT and GPT, are designed to process and generate text based on patterns learned from large datasets. Unfortunately, they lack inherent mechanisms to assess the veracity of the information they process. This limitation means that when these models retrieve information, especially through techniques like RAG, they may treat all sources with equal weight, regardless of their reliability.
For instance, if a model retrieves data from both a reputable academic paper and a fabricated AI-generated article, it might integrate both sources without distinguishing between them. This indiscriminate treatment can lead to the propagation of misinformation, as the model cannot inherently verify the authenticity of the retrieved content.
Context Collapse
When comparing multiple sources, often overweight transformers repeated phrases or patterns, rather than truly verifying facts. Transformer models, particularly those utilizing self-attention mechanisms, excel at identifying and leveraging patterns within text. However, this strength can become a weakness when the model encounters repeated phrases or patterns across multiple sources.
Instead of critically evaluating the factual accuracy of the information, the model may assign higher importance to the frequency of certain phrases or structures. This phenomenon, known as context collapse, occurs when the model overemphasizes repetitive elements, potentially leading to the reinforcement of inaccuracies. For example, if several sources erroneously state that a specific event occurred on a particular date, the model might prioritize this repeated information, even if it is incorrect, due to its pattern recognition capabilities.
If Perplexity were built on an SSM-based architecture, it could be improved by leveraging structured memory and long-term contextual awareness to reduce inconsistencies and hallucinations.
Currently, Perplexity operates primarily on transformer-based architectures combined with RAG, which enables it to fetch and integrate real-time information from external sources such as web pages or proprietary documents. While this setup offers access to up-to-date data, it lacks persistent memory and treats each query independently. As a result, the system often struggles with maintaining factual consistency over time, especially in multi-turn interactions or complex queries requiring reasoning across multiple sources.
By contrast, an SSM-based architecture, such as those used in models like Mamba or RWKV, offers the advantage of continuous memory over long sequences. These models are designed to simulate how signals evolve over time, allowing them to retain critical facts and suppress irrelevant or contradictory data.
For instance, in medical imaging, a Mamba-based model called AM‑UNet was used to accurately segment cervical cancer tumors from CT scans, demonstrating how continuous memory helps retain important patterns across long sequences of data. Similarly, if Perplexity integrated SSMs into its architecture, it could maintain a structured internal representation of facts and user preferences across sessions. This integration would prevent repeating misinformation retrieved from unreliable sources and provide more coherent and personalized responses over time.
Further improvements would also be seen in sequential verification and efficient cross-referencing. Checking sources one by one while maintaining a fact-checking memory, makes it harder for false information to slip through. For example, during the 2025 LA protests, AI tool Grok verified viral claims step by step, debunking a fake video through metadata and news sources and then using that memory to flag similar false content later.: In terms of efficient cross-referencing, handling long documents or many sources without losing track of important details is possible, because SSMs are designed for this kind of task.
Case Study 2: RoboMamba’s Precision in Robotics
RoboMamba, a robotics-focused SSM, demonstrates the practical benefits of this architecture outside of search. In laboratory tests, RoboMamba significantly reduced failed actions caused by hallucinations. This success was accomplished through real-time error correction. RoboMamba could adjust its grip on objects mid-task when sensors detected slippage, which was something transformers struggled with due to context overload. Making context-aware decisions, the model prioritized safety protocols over speed in unpredictable environments, reducing the risk of dangerous mistakes.
This kind of precision is critical for tasks like surgical robotics and automated manufacturing, where a single hallucination could have serious consequences.
How SSMs Compare to Other Solutions
Researchers have tried several approaches to reduce hallucinations in AI models, including reinforcement learning from human feedback (RLHF), which involves humans rating AI outputs to help the model learn what is acceptable. While RLHF is helpful, it can’t fix the underlying tendency of transformers to guess when unsure.
Another approach, Knowledge-Augmented LLMs integrate structured databases, but still rely on transformer architectures at their core. For example, in enhanced Text-to-SQL systems, the model first retrieves relevant schema information or example queries from a structured database, then uses a transformer (like GPT-3.5 or Codex) to generate the appropriate SQL query. This approach allows the LLM to ground its output in real data while still leveraging its generative capabilities.
SSMs offer a fundamentally different approach by changing how information is processed and remembered. They are especially strong in tasks where accuracy and long-term consistency matter, such as legal document review, medical research, and robotics.
The following table illustrates the differences between how the above approaches work.
| Method | Strengths | Weaknesses |
|---|---|---|
| RLHF | Aligns with human values | Doesn’t fix guessing |
| SSMs | Accuracy and efficiency with long texts | Less flexible for images/video |
Table 1: Strengths and Weaknesses of RLHF vs. SSMs
What This Means for Everyday Users
For most people, the shift to SSMs could mean a variety of things, such as fewer fake citations, better answers to complex questions, and even offline functionality. AI-powered search tools would verify sources before citing them, reducing the risk of being misled by fake citations. SSMs offer a significant advantage over traditional transformer-based architectures by maintaining structured memory and long-term contextual awareness. This capability enables AI systems to verify sources before citing them, thereby reducing the risk of propagating misinformation.
For instance, a study evaluating generative search engines found that existing systems often contain unsupported statements and inaccurate citations. On average, only 51.5% of generated sentences were fully supported by citations, and only 74.5% of citations supported their associated sentence. These findings highlight the need for AI systems to improve source verification processes to enhance reliability.
Additionally, the use of RAG has been shown to reduce AI hallucinations by grounding responses in actual documents. By pulling information from custom databases, RAG narrows the AI’s focus and helps ensure that factual claims can be attributed to sources. However, experts emphasize that the quality of RAG implementation is crucial, and human oversight remains essential to verify AI-generated content.
SSMs can also provide better answers for complex or rare questions. SSMs can handle long or complicated queries without breaking down, making them ideal for specialized searches (like rare diseases or technical topics).
Because SSMs are efficient, they could run locally on your phone or laptop, reducing the need for cloud-based processing and improving privacy.
Imagine asking, “What’s the best treatment for XYZ syndrome?” An SSM-based tool would check medical journals one by one, flag conflicting studies, and highlight the consensus-all without inventing answers or making dangerous mistakes.
Where SSMs Excel and Where They Don’t
While SSMs are promising, they aren’t perfect. Research shows that transformers are still better at tasks that require copying long chunks of text or remembering exact details from far back in the input. This is because transformers can “look at” the entire context at once, while SSMs compress information into a fixed-size memory.
However, SSMs shine in a number of tasks. When the input is very long (like legal contracts and scientific research) SSMs excel due to their linear time complexity, allowing them to handle extensive documents efficiently. For instance, models like Mamba and S4 have demonstrated superior performance in long-range sequence modeling tasks, such as the Long-Range Arena (LRA) benchmark, which evaluates reasoning ability and handling of diverse data types. These models can capture hierarchical dependencies over long contexts, making them suitable for tasks involving lengthy inputs.
Consistency and accuracy over time are more important than copying exact details. In applications requiring sustained accuracy and contextual understanding, SSMs maintain structured memory and long-term contextual awareness, reducing inconsistencies and hallucinations. In dialogue systems, SSMs can track user preferences and conversation history to ensure consistent and accurate responses over time. This capability is crucial for applications where maintaining context and coherence is more important than exact replication of details.
Running models on small devices or in real-time applications is meeting the needs of efficiency and lowered computational costs. SSMs are designed to be computationally efficient, making them suitable for deployment on devices with limited resources. For instance, a study demonstrated the efficient token-by-token inference of the SSM S4D on Intel’s Loihi 2 neuromorphic processor. This implementation outperformed traditional recurrent and convolutional models in terms of energy consumption, latency, and throughput, highlighting the potential of SSMs for real-time applications.
Researchers are now exploring hybrid models that combine the strengths of both architectures, such as adding attention-like mechanisms to SSMs for better context retrieval.
The Future of AI Search and SSMs
The transition to SSMs is already underway in some industries. Hybrid models like Mamba-2 blend SSM efficiency with some Transformer-like flexibility, making them suitable for tasks that require both long-term memory and attention to detail.
A notable example of this hybrid architecture is the Mamba-2-Hybrid model, which combines 43% Mamba-2, 7% attention, and 50% MLP layers. In a comprehensive empirical study, this hybrid model outperformed an 8B-parameter transformer model across twelve standard tasks, achieving an average improvement of +2.65 points. Additionally, it demonstrated up to eight times faster token generation during inference, highlighting its efficiency and scalability.
When extended to support long-context sequences of 16K, 32K, and 128K tokens, the Mamba-2-Hybrid continued to closely match or exceed the Transformer model’s performance on average across twenty-three long-context tasks. These results underscore the effectiveness of integrating Mamba-2’s structured state space modeling with selective attention mechanisms to balance efficiency, scalability, and performance in complex tasks.
In terms of enterprise adoption, banks, hospitals, and law firms are testing SSMs for tasks where accuracy is critical and hallucinations are unacceptable. Similarly, SSMs are being applied to research in a wide range of fields, from genomics and drug design to time series forecasting and recommendation systems.
As researchers continue to improve SSMs and address their current limitations, we can expect to see more AI tools built on these architectures, especially in areas where trust and accuracy are non-negotiable.
Conclusion: Building Trust Through Better AI Architecture
The race to build the best AI search engine is no longer just about speed or flashy features – it’s about trust. While transformers powered the first wave of chatbots and AI search tools, their tendency to hallucinate makes them unreliable for truth-critical tasks. SSMs, with their step-by-step analysis and structured memory, offer a new path toward AI that doesn’t just answer questions but actually understands them.
As tools like Perplexity and RoboMamba evolve, the winners will be those that prioritize architectural integrity over quick fixes. The next generation of AI search won’t just retrieve answers, it will build them, one verified fact at a time.
References:
- Transformer Models Are Better at Copying than SSMs
- Repeat After Me: Transformers Are Better Than State Space Models at Copying
- State Space Models Strike Back: Stronger Than Ever with Diagonal Plus Low-Rank
- Repeat After: Transformers are better
- LLM Hallucinations: What They Are and How to Fix Them
- Evaluating Hallucination in Large Language Models
MMS • Daniel Dominguez

Midjourney has launched its first video generation V1 model, a web-based tool that allows users to animate still images into 5-second video clips. This new model marks a significant step toward the company’s broader vision of real-time open-world simulations, which will require the integration of image, video, and 3D models to create dynamic, interactive environments.
V1 works by enabling users to animate images through two options: an automatic animation setting, which generates a motion prompt for basic movement, and a manual animation feature, where users can describe specific actions and camera movements. The system is designed to work with images generated by Midjourney as well as those uploaded from external sources, offering flexibility in video creation.
The model also introduces a unique workflow for animating images. Users can drag images into the prompt bar and mark them as the starting frame, then apply a motion prompt to animate them. V1 includes two settings for motion: low motion, which is suitable for ambient scenes with slow or minimal movement, and high motion, which is better for fast-paced scenes with active camera and subject movement. However, high motion can sometimes result in unintended glitches or errors.
When compared to other AI video generation tools currently on the market, V1 offers a distinct approach. Unlike more established platforms like Runway or DeepBrain, which focus on highly polished, pre-built video assets with complex editing features and audio integration, V1 prioritizes the animation of static images within a specific aesthetic that aligns with Midjourney’s popular image models. While competitors like Veo 3 are known for their real-time video creation with full audio integration and high-quality motion capture, V1 sticks to simpler video outputs with limited motion capabilities, focusing primarily on image-to-video transformations.
Midjourney’s V1 Video Model launch has sparked excitement across creative communities, with users praising its stunning visual consistency and artistic flair, often comparing it favorably to competitors.
AI Artist Koldo Huici commented on X:
Creating animations used to take 3 hours in After Effects. Now with Midjourney, I do it in 3 minutes! I’ll tell you how ridiculously easy it is.
While Gen AI expert Everett World posted:
It’s fantastic to have a new video model, especially since it’s made by Midjourney – it opens up new, unexpected possibilities. Some generations look incredibly natural (anime looks great!). Even though it’s only 480p, I think we’re seeing interesting developments in the AI video space, and I’m so glad we can have fun with this model!
Midjourney plans to continue evolving its video capabilities, with an eye on making real-time, open-world simulations a reality in the near future. For now, the V1 model is available for web use only, and the company is monitoring usage closely to ensure that it can scale its infrastructure to meet demand.
This launch comes in the wake of ongoing legal challenges for the company, including a recent lawsuit from Disney and Universal over alleged copyright infringement. Despite these challenges, Midjourney is focusing on expanding its technology, with V1 seen as a significant step toward achieving the company’s vision for immersive, interactive digital environments.
MMS • Ying Dai
Transcript
Dai: I have been at Roblox for almost 4 years now. When Jennifer first reached out to me, I didn’t have a thing to talk about. Basically, just do casual chatting. I told her what I’ve done at Roblox, the projects that I’ve done. I shared two stories. She immediately caught that there’s a thing there. There’s a trend that actually I’m shifting left from production to testing. Throughout this shift, I can see how my work contributes to increase the productivity of engineers at Roblox. I also want to call out that there are two things I pay particular attention to in my past 4 years, the two metrics, those are reliability and productivity. Those two things have been driving me to make all those decisions and leading our team when we are facing choices, leading us to make the decisions.
Background
I’ll start with some background. Then I’ll share two stories: first migration, and then second migration. Then, some of my learnings throughout the journey.
When I joined Roblox back almost 4 years ago, I started at the telemetry team. I was really excited back then because Roblox was actually the smallest company I’ve ever worked for. Before Roblox, I was at Google and LinkedIn. That was much bigger than Roblox. It was a small company, and I got to know a lot of people. I was so excited, like I can work with everybody. Everybody can know each other. Back then, the company was undergoing a lot of fast user growth. We’re still on a very fast trajectory. Everything was new to me. It was a very exciting experience to me to begin with. There are a lot of things going on. As the telemetry team, I got to experience all the setup, all the size and scale of our architecture infrastructure. We run everything on our own DC. We have almost 2,000 microservices. As the telemetry team, we were managing billions of active time series.
Then, that’s not the fun part. There were a lot of on-calls. The first week that I joined Roblox, the very first weekend, I was actually on hacking with a couple of friends. Somehow that route had signal, and I got paged. I got dragged into a Zoom call with the VP and CTO being there together, debugging some Player Count job issue. Then, the question that got to the telemetry team is that, is this number really trustworthy? Can you tell me where this number was from? Can you tell me if it’s accurate, if it’s really telling the true story? It was a really stressful first weekend. I almost thought about quitting the first weekend. I’m glad I didn’t.
Then, I just hang in there. Then, the worst part is that every SEV score back then, people would start with questioning telemetry first. Every time there is a company-wide incident, we got paged as a telemetry team. I would never have thought about that back at Google. The metrics are just there, you’re trying to read the numbers, trying to figure out what’s going on yourself. Who would actually question telemetry being wrong?
That was actually very common at Roblox back then, especially those SEV0, SEV1s, people would actually spend first 10, sometimes even 20 minutes to rule out the possibility of telemetry being wrong. I don’t really blame that, because the telemetry system was not so reliable. We did produce wrong numbers from time to time. That made me realize that telemetry, essentially, is reliability. Reliability should be the first metric to telemetry. Bad production reliability actually ends up causing very low engineering productivity, because all those engineers spending their time trying to work with us to figure out whether it’s a telemetry issue and how to fix the telemetry issue. That was really time consuming. Ended up having a very long, for example, mean time to detection, as well as mean time to mitigation.
We were like, we have to stop. We need to fix this. Let’s take a closer look at the telemetry problem. The problems were actually everywhere, basically. We took a look at the in-house telemetry tool. The engineers prior to us, they built a very nice in-house telemetry tool that actually lasted for years. Served the company needs really well. This in-house tool, it’s responsible for metric collection to processing to storage and to visualization. Everything was in-house. There’s some clear disadvantage of this pipeline. The bottom chart is a high-level overview of how this pipeline works. If you pay close attention, at the very end, there is a key-value store. That’s a single key-value store. Which means if you want to get a metric, for example, QPS, and then latency per data center across all your services, per data center, and then you want to GROUPBY by a different dimension, for example, let’s say per container group or something.
Then, you need to go through this whole process, create this processing component here to generate the new key-value here. That’s a very long process for generating a single chart. We have to go through this whole thing to be able to draw a chart in our in-house visualization tool. It’s very inflexible and very slow. There are some other problems with this old pipeline. We have everything built in-house. Our quantile calculation was also built in-house. We made very common mistakes of how quantiles should be calculated. You got quantiles on a local machine. Then you got quantiles by aggregating among all machines. That’s a very typical mistake of how to calculate quantiles. There are inconsistent aggregation results with other standard tools.
The worst part is that if you make a mistake in all of your systems by all of your teams, the same mistake, you probably can still see the trend of telemetry going wrong by looking at the wrong number, because they’re making a mistake. Maybe the trend still tells you something. The worst part here is that some teams are using this way to calculate things like quantiles. Some other teams, they’re using maybe the open-source standard way to calculate quantiles. When we do side-by-side comparison across services owned by different teams, we got very inconsistent results. Then, there are availability issues. As a telemetry team back then, our availability was less than 99.8% availability, that means we have at least four hours of outages every quarter. I don’t blame people who questioned telemetry at the beginning, because we have so many outages.
The First Migration
With all those problems being identified, it’s clear that we need a better telemetry solution. We came up with a very detailed plan. The plan contains three steps. Step one is to design, implement, and productionize a new solution. We evaluated like buy versus build options. We ended up with Grafana Enterprise and VictoriaMetrics as our telemetry solution. We productionized our infrastructure on top of that. Step two is transition. It’s clear. When you do migration, you do it right for some time period and then you kill the old one, and then you move to the new one. Throughout the transition process, you make sure your data is consistent. Because it’s telemetry, you also need to make sure the alerts and dashboards, they’re taken care of. The very last step is basically to remove the old pipeline, and then we can claim victory. That was the plan. That was my first project, basically, after joining Roblox. We did estimation and we thought one quarter should be enough.
One month for developing, one month for transition, one month for kill, and celebration. That’s just me doing engineering estimations. Then, the reality. That was also very eye-opening for me because, from telemetry side, we can see all the limitations, all the shortcomings of the old tool. The reality is that migration of basic tools is very hard. Like I said, that was an in-house solution that has been existing for almost 10 years. There were a lot of customizations made to the in-house tool to make it really easy to use and really pleasant during the incident calls.
For example, there are very customized annotations to label every chart, like the changes that are made to the service, deployments, configuration changes. Then there were very small things like a very cool Player Globe View. There are latency differences, like I mentioned earlier, like quantile calculation was a big pain point. Very inconsistent. The technical issues just takes time. We spend more time. We can bring those two tools closer to each other. Those are easy. We can just focus on our day-to-day job and get those problems solved.
Then, I think the more difficult side from my experience looking back are actually engineers, our engineers, they are very used to and attached to the old tool. It has been there for almost 10 years. I can share some stories. We tried to include a new link to the old chart, which will redirect people, if they click them, will redirect them to the new chart in this new system. Everything will be very similar to the old one. Engineers, they choose to stay with the old tool.
There was one time, I remember, like if they want to go back to the old tool, they have to attach redirect equals to false to their URL. We tried to create those frictions for them to use the old tool. That’s just people, they tend to use redirection. They will just add manually every time, even bookmark redirect equals to false to the old tool. It’s just like that stickiness and attachment to the old tool. That was really eye-opening for me. We also realized that because people just love the old tool, if we force them to move, it would harm their productivity. The people who actually get harmed, their productivity, are people who have been there for years. Those people are valuable. They have valuable experiences during, for example, incident calls and debugging complicated issues. We need to take care of those people’s experiences carefully.
What happened then? Instead of one quarter, it took roughly three quarters. There were three key things that we actually invested in to make this migration smooth. First one is reliable. The reliable meaning our new pipeline needs to be super reliable. Remember I said there was 99.8% availability with the old one? We managed to achieve 100% availability with the new tool for multiple quarters in a row. Then people started to trust this new tool more than the old one. Then, delightful. That’s my learning, and now I also apply this to future migration projects that I worked on, that the transition experience really needs to be delightful.
Try to ask at the minimum work from the customers, even just internal tools. Try to ask as minimum as you can, and do as much as you can for them. Then, overall, if we can make it reliable, make the experience delightful, you will see a productivity improvement. Also, usually the new tool, we bake into our new thinking of how to improve their productivity. When they are getting used to the new tool, we can also see a productivity boost.
I’ll give you some high-level overview of the architecture. This is not the architecture that you’ve always wondered, so I’ll stay very high-level here. Remember I said the problems with our storage, that there were limitations. It wasn’t as scalable as we hoped it to be. We choose to use VictoriaMetrics. We shard our clusters by their services. We have a query layer on top to help us when we need to re-shard. When a service gets too big, it probably needs its own shard. Then we move those services to its own shard and dual-write for a while, have those query layers covered up, so people won’t tell the difference when we move their data around. On the right side is our Grafana setup. We actually set up our Grafana in AWS with multi-region and multi-availability zones. A single version failure wouldn’t actually cause any impact to our telemetry system. It worked pretty well, at least for us. That was the architecture.
Now I’m going to share more about the transition. How we make the transition internally, are three major steps. First, we send a lot of announcements to get a lot of awareness. Those announcements are usually top-down. We send it to email, Slack, and also put up a banner on the old tool, just to get awareness. You wouldn’t believe how people try so hard to deny reading all the messages that are reaching them. Yes, announcements, getting the awareness. That’s the first step. Then we took the soft redirect approach, like the redirect URL equals to false. That trick. That was one of them. We put up a link to every chart, every dashboard in the old tool.
Basically, we prompt them to create a new tool and take them to the new Grafana chart, which basically is an identical chart. People don’t really click that. I’ll share more. After the soft redirect period, that was actually several months. When we reached a certain adoption rate with the new tool, that’s when we start to enforce the hard redirect. If people really need to go back to the old tool, that’s when we enable it.
Otherwise, it will be hard redirect. By the time we actually enable hard redirect, the daily active usage of the old tool was less than 10 already. What we did along the way. We did a lot of trainings. You wouldn’t believe for internal tools, you need to organize company level sessions, also callouts, ad hoc trainings. If a team requests a training with us, we’ll be very happy to just host a training session with them. We also have recordings, but people just prefer in-person training. Also, we kept an eye on our customer support channel and usage dashboard. We proactively actually connect with heavy users and their teams. We try to understand, what is blocking you from this new tool? For a time period every day, we just get the top 10 most active users of the old tool, and we’re going to reach out one by one to them.
At the end, we actually made it. We delivered a reliable telemetry system. We deprecated the old tool. The on-call is still part of life, but it’s just much more peaceful. Some more fun story to share is that, at Roblox, we have many incident calls. During those incident calls, a true rewarding moment was that people started to send those new tool links, like Grafana chart link instead of the old tool link in the Slack channels to communicate with each other. Because the old tool is still unreliable. Sometimes it has issues.
If people report, like the old tool has issues, we don’t even need to jump into the conversation. Our customers who are used to the new tool already, they would actually reply back to those customers saying, try the new one. The new one is super cool. That was a really rewarding moment, now thinking back. The on-calls are still part of life. The good thing is that people don’t really question telemetry when they get paged, which is a good thing. Then, still there are other improvements we can make to our telemetry system. For example, how to make our root cause analysis easier. Those investments are still ongoing.
The Second Migration
For me, personally, first migration was done. What’s next? I was at the telemetry team. I also spent some time trying to build an automated root cause analysis system with the team. Then, soon I realized there are still incidents, and it doesn’t take that much time for us to analyze the root cause of those incidents. We analyzed the root cause of those incidents. Soon we realized that, actually, 20% of them were caused by change rollouts. That was a lot of financial loss and also user engagement loss to us.
Also, just imagining how much time our engineers need to spend time on debugging, triaging, and also doing postmortems on those incidents. Just a lot of engineering productivity loss, in my opinion. I talked to my boss, and then, instead of improving telemetry, I told him I probably want to have a better understanding of the incidents and see how I can help with actually reducing the number of incidents. It was very obvious, validation of the rollouts needs improvement. It’s still a lot of manual steps involved today, but back then, 100% manual steps were involved in change rollout at Roblox. When a change got rolled out first, it would be manually triggered by an engineer. This engineer needs to be responsible for the validation of this change. By looking at the charts, the alerts, pay attention to their secret runbook.
Then, if there’s any issue, the manager would be responsible for rollback, if needed. We really trust our engineers throughout this process. No matter how good engineers are, we’re all still humans. There are still misses sometimes. Depending on the level of engineers, like junior engineers sometimes they’re not really experienced. They don’t know which chart to look at. There’s no way of blocking production that protects them from making mistakes. It happens, basically. It contributes to 20% of incidents. It’s very obvious that improvements must be made. We need to add automated tests to our rollout pipeline and add automations of rollout trigger, rollback, and all those validations. Everything should be automated. There are so many manual steps involved in a change rollout, there are a lot of rooms for improvements.
Then, our question is where to begin with. I didn’t really know. I feel like there were just so many things that we can do. Just get one thing done and let’s see the results. Our PM told me to do some customer interviews. I’m glad that I listened to him. I did a lot of customer interviews together with our PM in our group. Customer interviews for internal tools. We talked to a lot of groups. They were telling us the same story, like tests are, in general, good, but our test environments are not stable. Roblox’s infrastructure is too complicated. The test environment is hard to make it stable. Teams today have their own validation steps. It’s really hard to generalize and automate all those validations, because we have the client apps. We have the platform side. We have the edge side, the game server side. It’s really hard to generalize those validations for all the teams. We decided our first step is to automate the canary analysis part. Why?
First, canary analysis happens in production. Production is stable. We don’t need to deal with the test environment problem at least for now for this step. Second, it would actually bring immediate values to improve our reliability. Our reliability is just not good. Twenty percent of incidents were caused by changes. There are a lot of low-hanging fruits there. Let’s start with this canary analysis, get the low-hanging fruits done. Third, thanks to my experience working on the telemetry team, back then, we created common alerts, because we know the common metrics. We created common alerts for services. Those common alerts can actually be reused for defining the default canary analysis rules. That sounds like a good start.
Again, we came up with some plans. I’m the type of person who likes to do plans a lot. Borrowed from my previous experience, essentially, this is still a migration project. Migrating from the old deployment tool to the new one with some automations. Step one, we designed our new solution. Our new solution involved a new internal engineering portal for deploying their services. Back then, at Roblox, before this tool, we don’t really have a central place where you can view a catalog of services. Everything is just thrown at one single page. You cannot really tell how many services are there, and what services are having changes, or who owns what. It’s just really a mystery to tell back then. We also define the canary analysis by default. Sometimes teams, they don’t really have canary instances. When they roll out to production, it’s to 100% with one single click.
Then we also define a set of default rules that can compare canary metrics with non-canary. Those rules were basically based on the default alerts that I mentioned previously. At the end, we also designed a new automated canary evaluation engine. Step two, our plan was, let’s develop the new solution and then move to transition. We’re going to enable canary analysis for every service rollout. We’re so friendly, we invest so much into customizations. We think people will like us. We also allow them to choose whether you want to have auto rollback and roll forward. In our design, those were all considered, because we thought that this would be a very easy and friendly project to roll out. We had all those things considered in our plan. Then step three is basically deprecation, disable the old way of service rollout. That was the plan.
As a spoiler, we ended up sticking to this plan. There are some hiccups or pushbacks. Again, we got a lot of pushbacks. This time, the pushback was even stronger than the telemetry migration project. There were just productivity concerns. The screenshot here is a snippet of the old tool, what it looks like. Just like two text boxes and a button at the bottom. Then, that’s it. Basically, that’s all you get from deploying your service. After we deploy, probably there will be a table showing you the progress. That’s it. Everybody goes to this place. Everyone’s deployment is visible to each other. Just to recall, we have 2,000 services. Also, that was quite fascinating. People really stick to this old tool and think that this old tool can give them productivity boost because it’s a single click.
The new tool, because we introduced the default 30-minute canary analysis validation phase. When we were debating how long the default time duration should be, I told them, I’m so used to 45-minute canary validation phase. People were like, no, we can only do 10 minutes. We ended up with 30 minutes. That was a very random number we came up with. We got a lot of pushbacks. At the end, we actually reduced it a little bit to begin with. Then the third pushback, again, just new tool and new deployment workflow. People actually told us that it takes time to learn. Even though we even had a UX designer for this internal tool, we thought the whole operation, the workflow, is very streamlined, but no, engineers don’t like it.
Just a high level of what happened. This is a magic three quarters. Yes, it’s just a magic number. Again, we did it together in three quarters. In summary, again, those are the three pillars that I think plays a key role to the success of this project. Reliable. Because of canary analysis, it’s such an obvious low-hanging fruit, it ended up actually catching a lot of bad service rollouts to production. We had the metrics to track that. We tracked the services that failed at the canary phase, and actually ended up getting rolled back. That same image version never got rolled out again. We have a way to auto track that number. That number was really high. It was really delightful. Those new tools are just so obviously better than the older one. Every service gets its own page. You can clearly see who owns what. What are the alerts configured to those services. Which alerts are firing. What are the recent changes, deployments. This is so easy to tell what’s going on with a service.
After a while, after the initial pushback, people started to like it. We pay very close attention to their feedback. We just invest heavily to make sure that this is a delightful experience for them. After everyone transitioned to this new tool, we clearly saw a boost in our productivity. Throughout our user surveys, people reporting their productivity themselves, or show their appreciation to our new tools. Also from our incident drop, we also measure how many bad service rollouts actually caused a production incident. The number was much lower than before.
This is just showing you the canary analysis, the UI. I didn’t manage to get approval for getting a full screenshot of what the new tool looks like. This is just the canary analysis part of the new tool. You can see on the top is the deployment workflow. There is a canary deployment phase that happens automatically for every production rollout. Then there is a canary analysis phase in between. If people click that, they can see a clear analysis in the Grafana charts, set of rules, and how long, and all the configs that were configured for this run.
At the end, there is a production rollout with a clear progress report and easy navigation to their logs and charts, everything. We also allow customized rules, configs. Our engineers really like UIs. Somehow our engineers, they don’t really like command line tools. We made everything in the UI. They can just click and edit their custom rules and configs. When they submit, we’ll automatically create a PR for them. Everything is checked in on GitHub. Every change will need to be reviewed by their teammates.
This is the adoption trend with this project, canary analysis. There are some fun things that you can tell from this trend. You can see at the beginning, the slope was very steady. We were having a really hard time to get early adopters. We talked to people. We tried top-down, and also, we tried bottom-up approaches. Talking to people, “Try our new tool. It’s really cool. Get your team on board”. People will say yes, but then their whole team is still on the old tool. We also tried the top-down approach. Talk to managers, “Your team owns those services. Those service rollouts are crucial to the success of the company. You have to use this new tool to ensure your service rollout is reliable”. It didn’t work well either. What ended up working well was that we collaborated, we have a reliability team, with SREs.
Then, when there’s another incident caused by a service rollout, we would jump to that incident call and also tell them how canary analysis could have prevented the issue. Of course, that was after the mitigation is done. We jumped into those calls. Also, we joined the postmortem process and basically onboarding with automated canary analysis, part of the action items. With that attraction, with the critical services and also incidents, the good thing about incidents is that it has a lot of awareness. A lot of people pay attention to them. We got those services on board. Then, there are people, basically, people with the spirit of awareness. We also get our own teams, our peer teams to try our tool.
From all those directions, we start to have slowly increased adoption in our new tool. I think this one, this big jump was actually because there was a reliability initiative email sent out, announcement sent out just basically saying, you should be all using automated canary analysis. Those are the examples where we could actually prevent those incidents with automated canary analysis. Both bottom-up and top-down, that’s how we get our adoption. Over and again, we start to see a lot of self-adoptions.
Basically, this is just organic growth. We also changed our onboarding tool for new hires. Basically, we do change that page to use this new tool. We paid a lot of attention to details. New hires, they just like this new tool. They will never go back to the old one. As of today, it’s already being used 100% for all the service rollouts. I don’t think, actually, in this case, no one is missing the old tool. The telemetry use case, there are still people missing the old one. This one, no.
What’s next? Canary analysis is actually a true low-hanging fruit, I think. Because we do need to deal with the environment problem. I do think creating a stable test environment and being able to deal with all those version conflicts and also run the integration test with the real dependencies, that’s a more complicated, in my opinion, problem to solve. That’s a good start to begin with. What’s next? Next year, we are investing heavily in integration tests and help our engineers to write good tests, and also improve our integration testing environment with all those micro-environments, allow them to run integration tests with proper dependencies, and also automated, basically like continuous delivery, CD support.
Summary
Just a reflection on the two migration stories. Those are just my personal key takeaways from my experiences. Make production tools highly reliable and available. That’s the basic needs. Internal tools really need to be reliable and available. Sometimes they’re like telemetry, for example, and also the deployment tool. They’re probably the ones that require the highest availability numbers. Understand what is needed most and where to invest. Thinking back, I feel very glad that I listened to a lot of people’s opinions, like our PM’s advice. I listened to our customers.
All those voices really helped us to make the decision. Have a North Star with a clear path on how we get there. Remember those two plan slides? I feel like they are crucial, even though we didn’t really stick to the timelines. We were really off on the timeline side. We stick to the plan. Those are our North Star to guide us. Even though there were pushbacks. For example, there were slow adoptions. There were those moments. We need to believe that what we’re doing is really beneficial for the company and for the engineers, and stick to the plan.
The fourth one is, be considerate and don’t be interruptive. Even though it’s just internal tools, we need to be really considerate to our internal engineers’ productivity. Roblox today has over 1,500 engineers. There’s a lot of engineers and a lot of productivity time. Don’t be interruptive. Just don’t force them to change, is my personal takeaway. Then, a delightful experience is extremely important for internal tools. Internal tools, they are just like external product now. In my opinion, you need to make it really delightful and easy to use, almost like an external facing product.
Questions and Answers
Participant 1: How are your rules tuned to handle different cardinality of metrics based on high traffic applications and non-high traffic applications?
Dai: How I tune that, that’s still an area that we’re investing. The current struggle we have, one is at every service level, setting a limit. We have a monitoring on which service is giving us more unique number of time series in a very short time period. We’ll get alerted for that. We’ll actually drop them. Unless they fix their metrics, we’ll drop this particular metric from that service. That’s one thing. Also, we have other layers of throttling on the cluster side. We use VictoriaMetrics. They also have tools for us to use.
Participant 1: Have you had false positives where you have a canary run that fails and you investigate and it’s actually a problem with the run itself and not a bug?
Dai: Yes, that happens all the time. We do track false positive and false negative, to see if a canary succeeded or failed. Did it end up, like this version gets rolled out or rolled back? We do check those numbers. Our current number, we are at about 89%, 90% accuracy. It’s not 100% all the time. To address that issue, I don’t think it’s our team. We have a very small team supporting this tool, at least at Roblox. We cannot afford to solve this issue looking at every single issue for every service. I think what we do and I think worked pretty well is that we train our users.
Instead of giving them the correct rule, taking a deeper look with them together, it’s basically, we send them the guide on how to tune their rules. They know their metric better. They were the ones who were doing the manual validation. They know how to set up the rule. Our general philosophy is basically, teach them how to use the tool, how to tune their rules. After that, it’s them. Also, sometimes, it’s better to be more aggressive on those tools.
Participant 2: You talked a lot about pushback from the engineers and the users of the tool. You didn’t talk at all about pushback from the executives or higher ups. When a project goes three times longer than you expected, usually, someone’s going to say, what’s going on here? How did you manage that?
Dai: There was a lot of pressure to manage. I got a lot of direct pings from a very high-level person asking me, why are we doing this project? Also, very high-level people talked to my bosses’ boss’s boss, several layers above, can we stop this project? How I handled that is, basically, I did a lot of company-wide sessions, including office hours with executives and very high-level people, like explain to them using numbers rather than the perception. Numbers tell them why we need to make this transition from the reliability gains, from the cost gains, from the engineering efficiency gains. Just try to convince them. I also really listened carefully to their feedback and try to invest however we can to make their experience better. If they say this annotation on Grafana looks different from the old tool, we spend a lot of time trying to fix those annotations, trying to align the timelines to seconds, just to bring the experience closer. I think at the end of the day, we’re just all humans. We spend so much time trying to make them happy. I think people would actually also show appreciation and understand the importance of our work and the respect we give to everybody during this migration.
Participant 3: Could you talk a bit about how you made sure that your new telemetry tool was actually giving you the right numbers? Did you have some process to compare the results with the old one?
Dai: Telemetry, it’s basically like counters, gauges, and quantiles. The counters and gauges, I don’t think our old tool was doing anything wrong. I think we had a good understanding of how the open-source world is dealing with those ways of measuring metrics and performances. The only thing that’s different from the old tool and the open-source world was the quantile. It’s not magic. You have the raw numbers. You can do calculations. You can get the real numbers of the real quantile distribution. You have the histogram calculations and also the old tool quantile over quantile thing. You basically compare all those three numbers. It wasn’t that hard to get which one is closer to the real quantile distribution.
Participant 3: Was it a manual validation or did you automate it?
Dai: We have automated validation and also a manual one. Manual one to prove that the old way was wrong. The old one to prove that the new tool and the old tool produced a similar metric output, with the differences, which is basically quantile, the new tool is basically correct.
Participant 4: You talked about build versus buy in the first migration, but I was interested if you ever revisited that as you were building, particularly the canary capability.
Dai: Yes, I revisited it. I think it’s a question that I don’t think there is a perfect answer. It’s really case by case. Sometimes it’s company by company. When you want something quick, buy seems very feasible. It can give you something really quick and it can solve your current problem. As you’re getting bigger, the costs are getting higher, when you reach a certain number, you start to take a break and think about the solutions.
See more presentations with transcripts